
TABLE OF CONTENTS
When setting up a new camera recipe for a different type of stencil, the detection settings may need adjusted. First, place the stencil on the machine and open the Watt Laser Suite app. To create a new camera recipe, follow the steps outlined here.
Accessing Detection Calibration
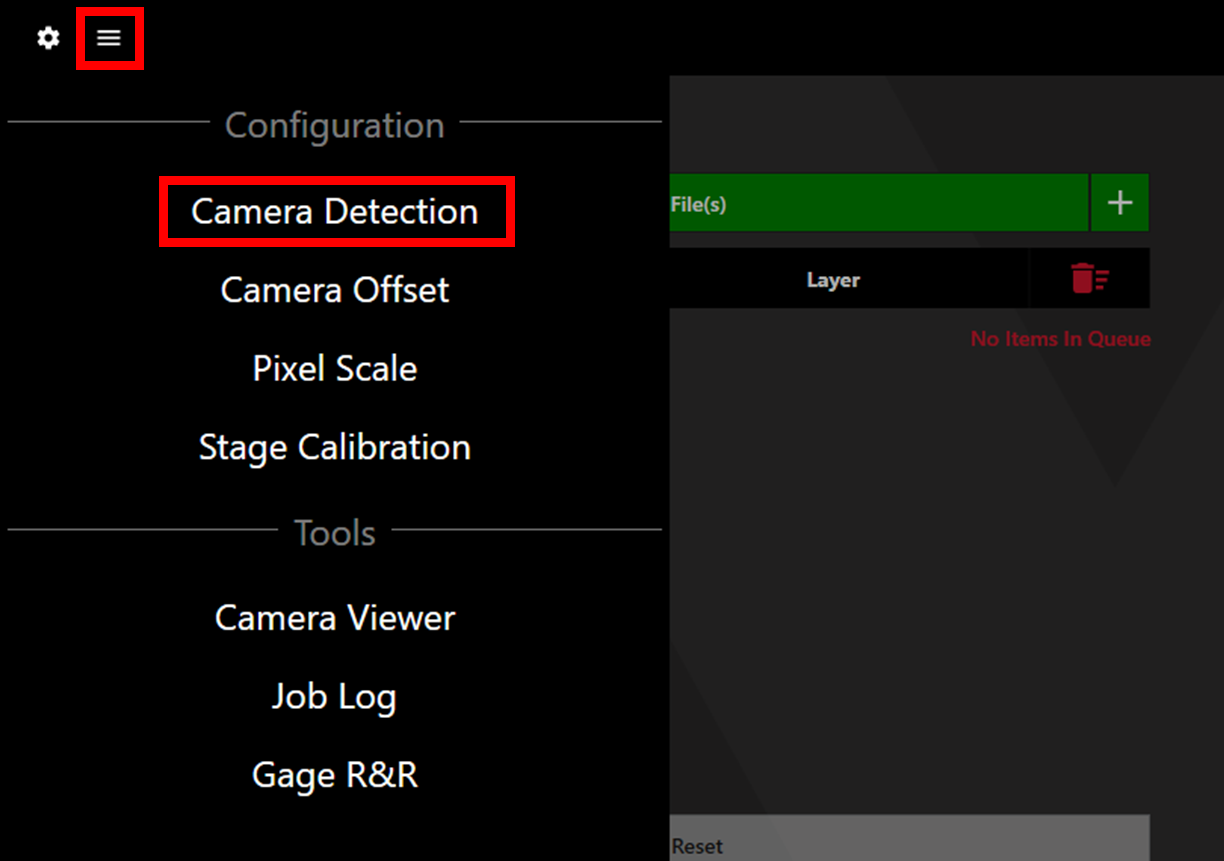
In the Watt Laser Suite app click on the menu button in the top left corner and select Camera Detection.
Detection Calibration Basics
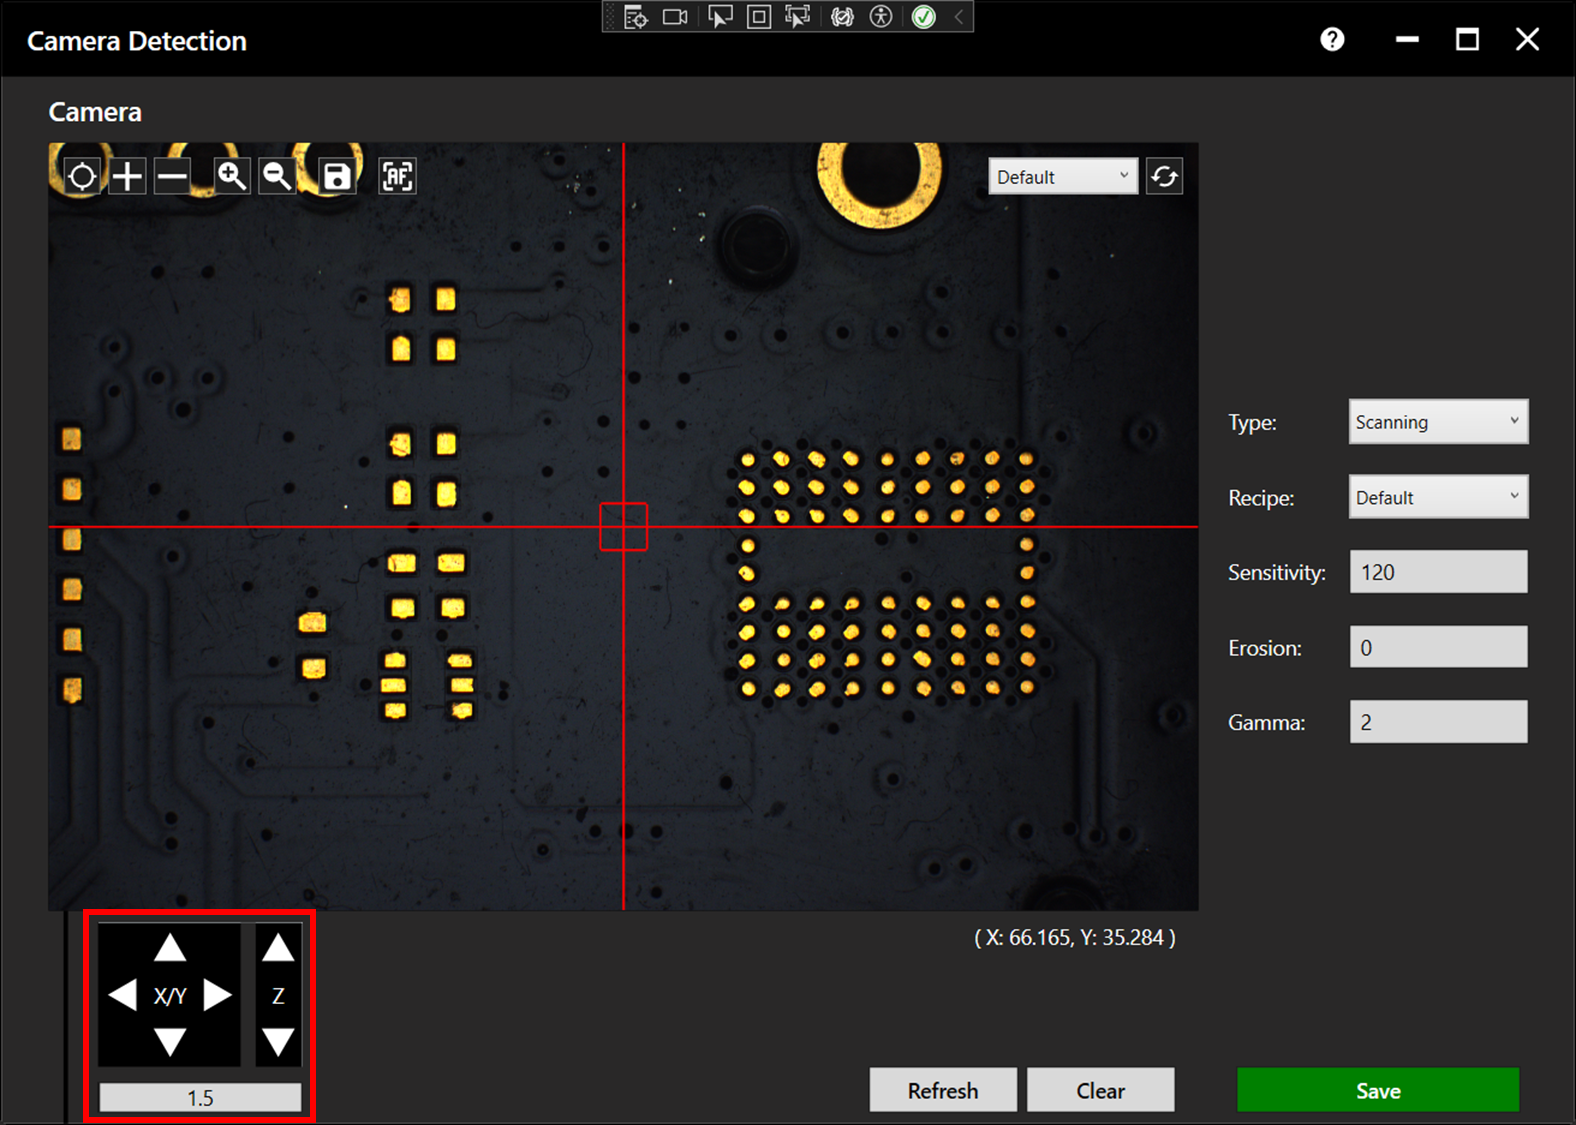
The camera detection window will open. Position the camera over apertures/features using the X/Y pad and/or by clicking on the camera image. The size of the steps taken using the X/Y pad can be adjusted by typing the desired step size in the box below the pad.
From the dropdown menu, select the relevant recipe for detection calibration. Auto Focus (Not available/required on the SE12) then click Refresh to see the current detected shapes.
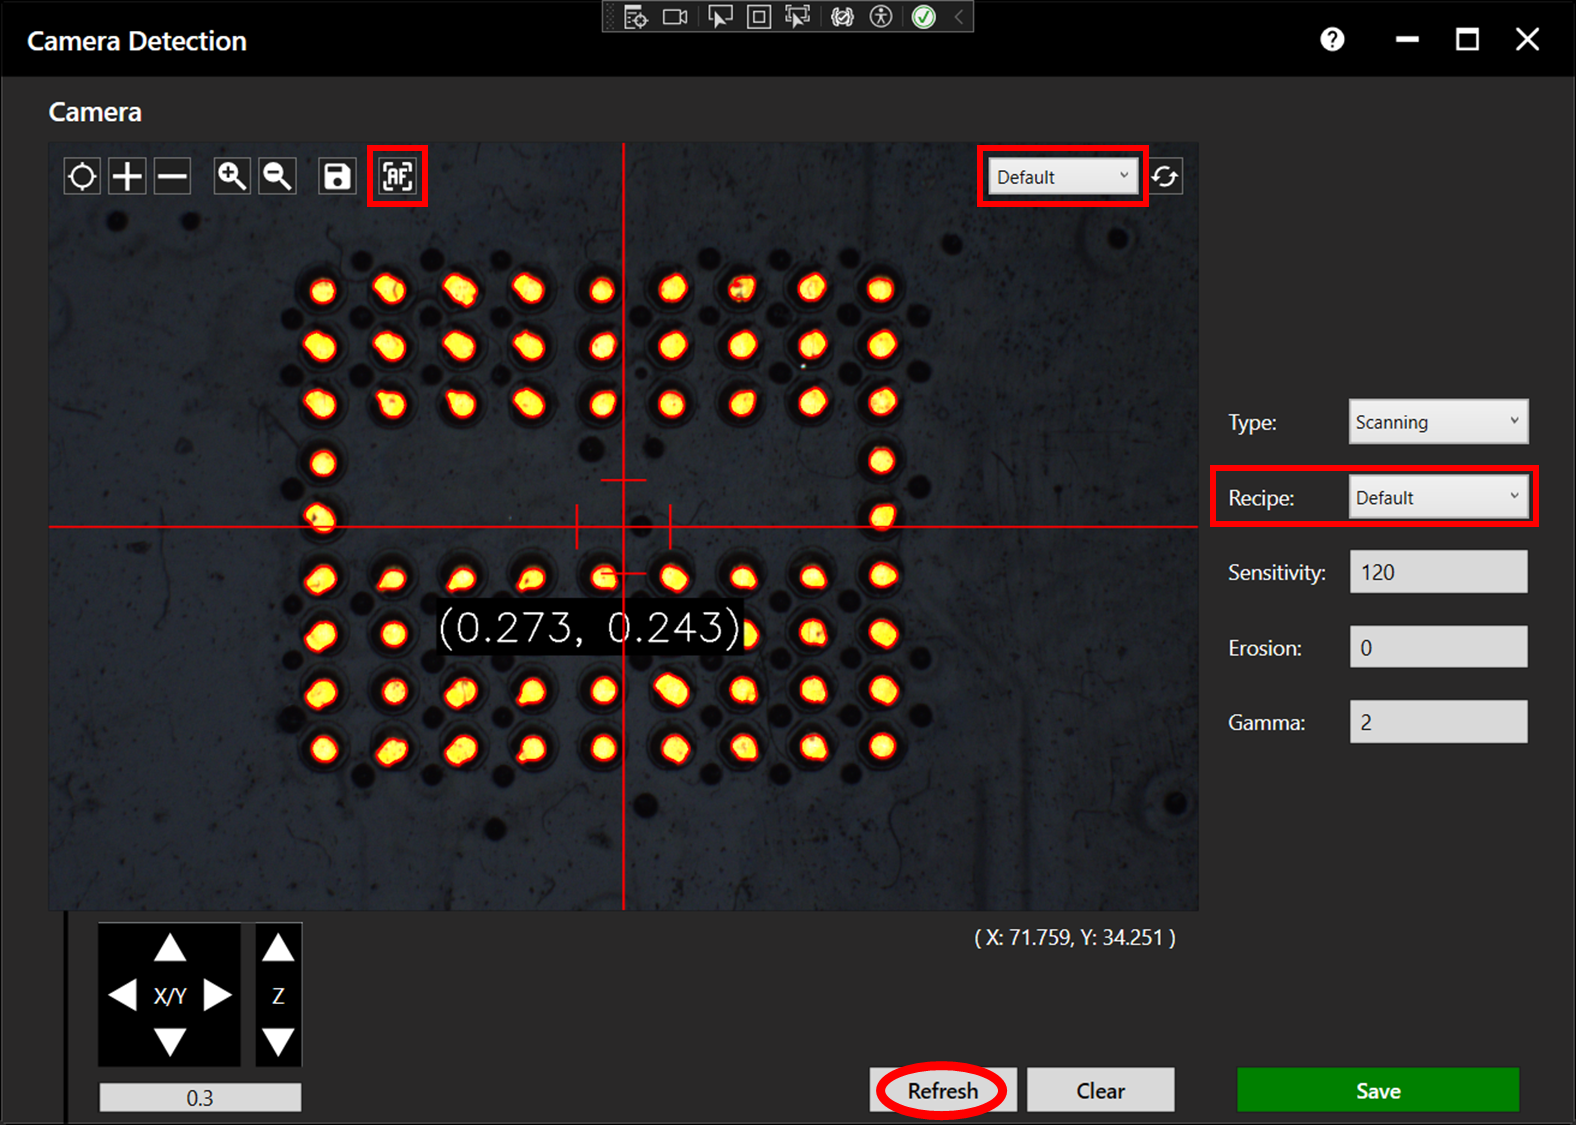
Adjust the parameters until, after clicking Refresh, all of the apertures are detected with a clean red outline.
The dimensions of a single feature are also displayed. Using features with known dimensions helps to fine tune the detection settings.
Click Save to save the new values, then switch to the second camera using the dropdown menu and repeat the process. The SE12 does not feature a measuring camera and therefore detection settings on this machine only require calibration on the scanning camera.
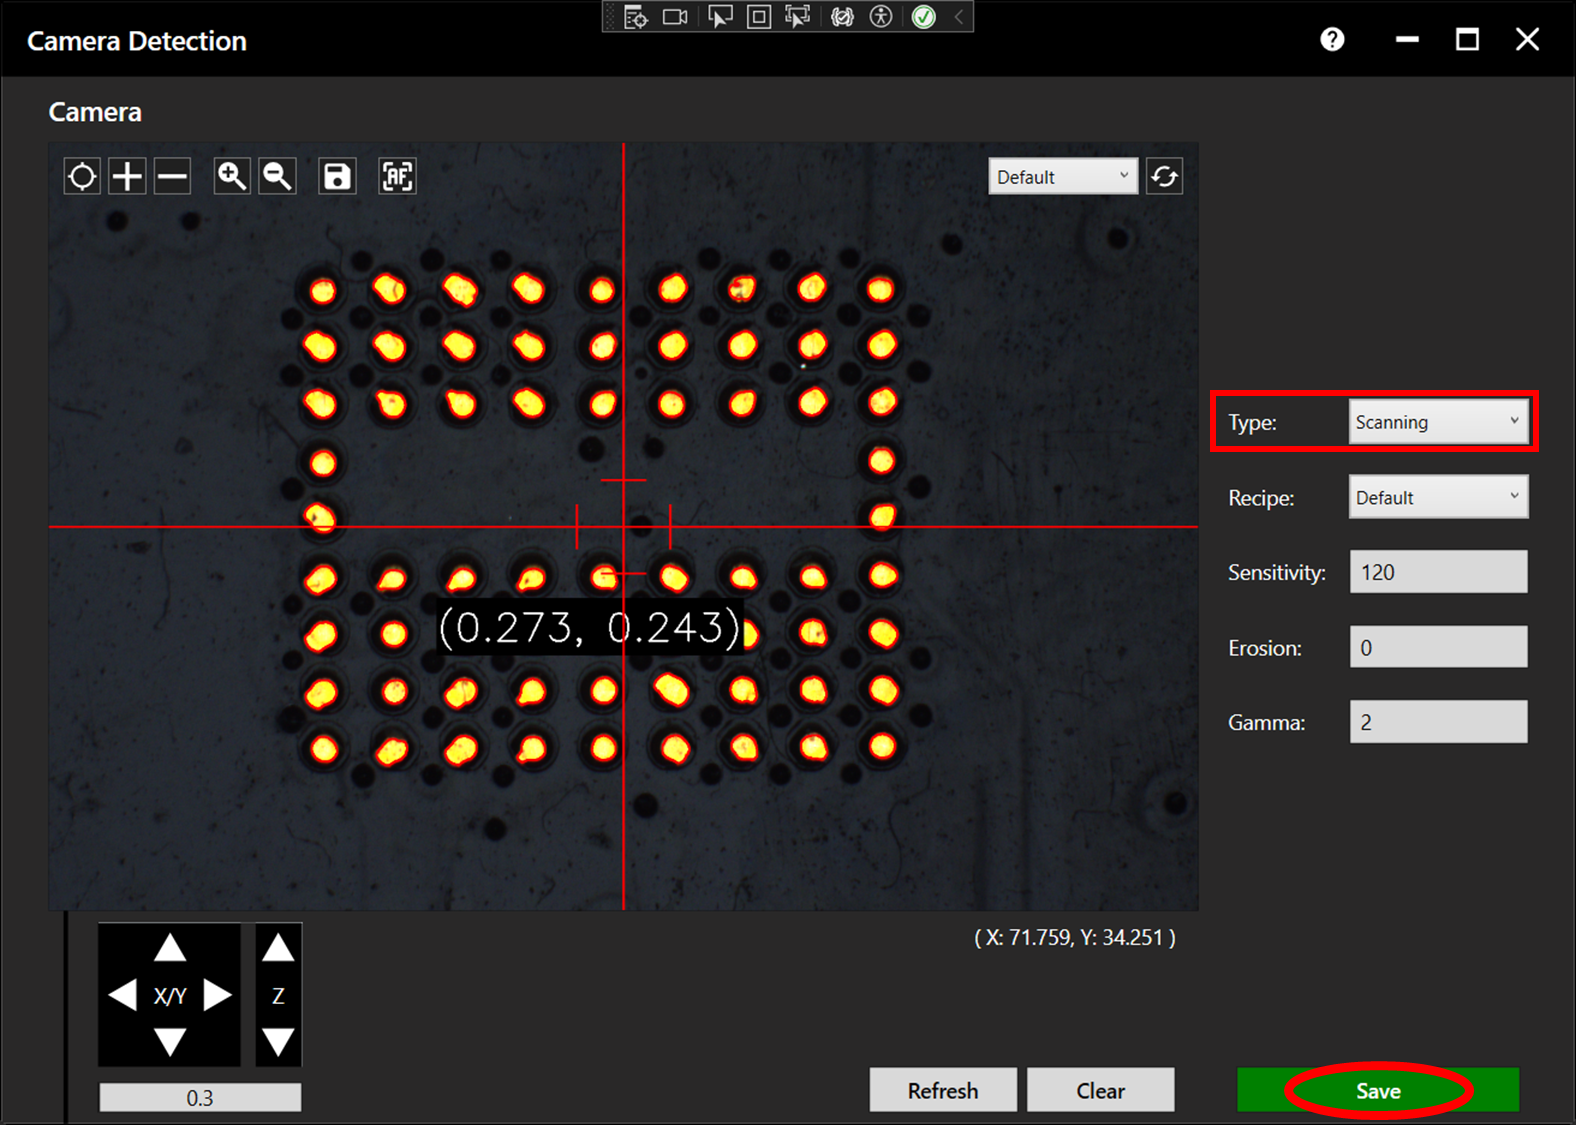
The Parameters are as follows:
| Parameter | Description |
| Sensitivity | A high sensitivity value will detect apertures more easily but will be less refined. A low sensitivity may struggle to detect apertures but will have a tighter definition. |
| Erosion | Dust or small imperfections next to an aperture can alter the detected aperture shape. The erosion setting reduces this deformity but will have a tighter definition. A too high erosion value could result in true deformities being missed. |
| Gamma | Gamma refers to the brightness of the image. Increasing the gamma will result in a brighter, less contrasted image. While setting a negative gamma will increase the contrast but amplify unwanted shadows/reflections. |
Note: Detection is improved on a clean stencil. If it is too difficult to find good detection settings, the stencil may require cleaning. Additionally, if good detection settings cannot be found, the issue may lie with the Camera Lighting Settings.
Recommended Calibration Procedure
Detection settings vary depending on environment, material, and camera settings. Similarly, the best calibration process may vary from situation to situation.
Enter the following initial values, then adjust only sensitivity. Once the best sensitivity value is found, adjust the the other settings to fine tune the detection. The sensitivity value may require further adjustment after changing the other values.
| Parameter | Value |
| Sensitivity | 100 |
| Erosion | 0 |
| Gamma | 2 |