TABLE OF CONTENTS
Selecting Alignment Apertures
If the alignment file (or alternative file if no alignment file is used) contains more than two apertures, the operator will be requested to select 2 - 4 alignment points. These can be selected from the location list, or within the plotter by clicking or window selection.
Note: The chosen apertures should be in some way distinctive, whether by location or shape, so they can be located during alignment.
Once apertures have been selected, click Submit.

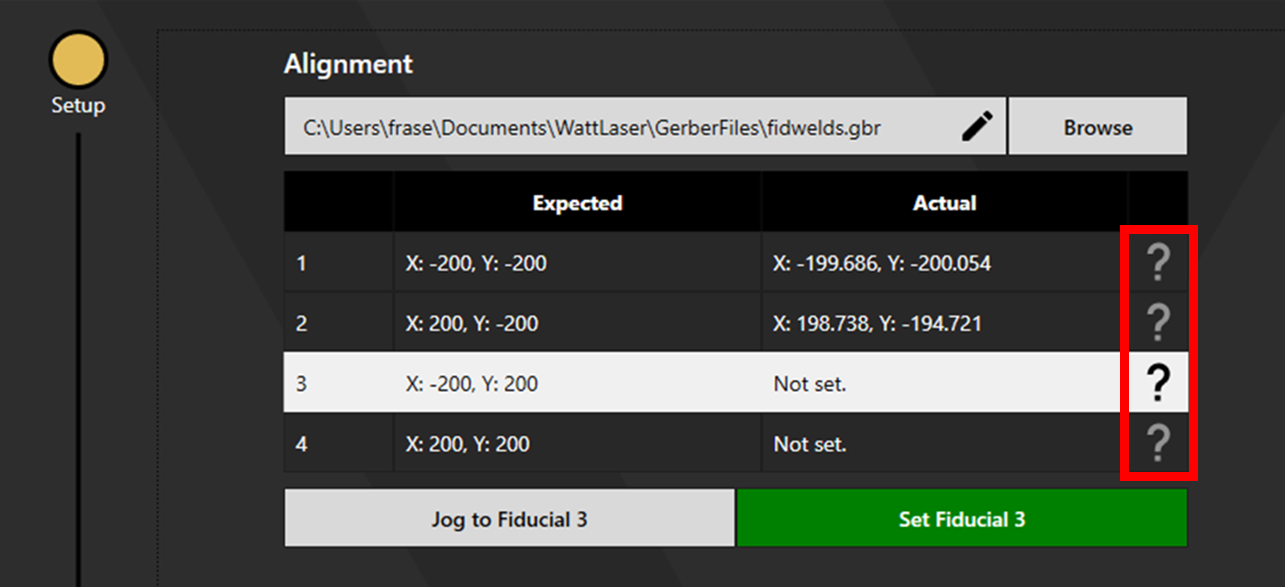
Aligning to Fiducials
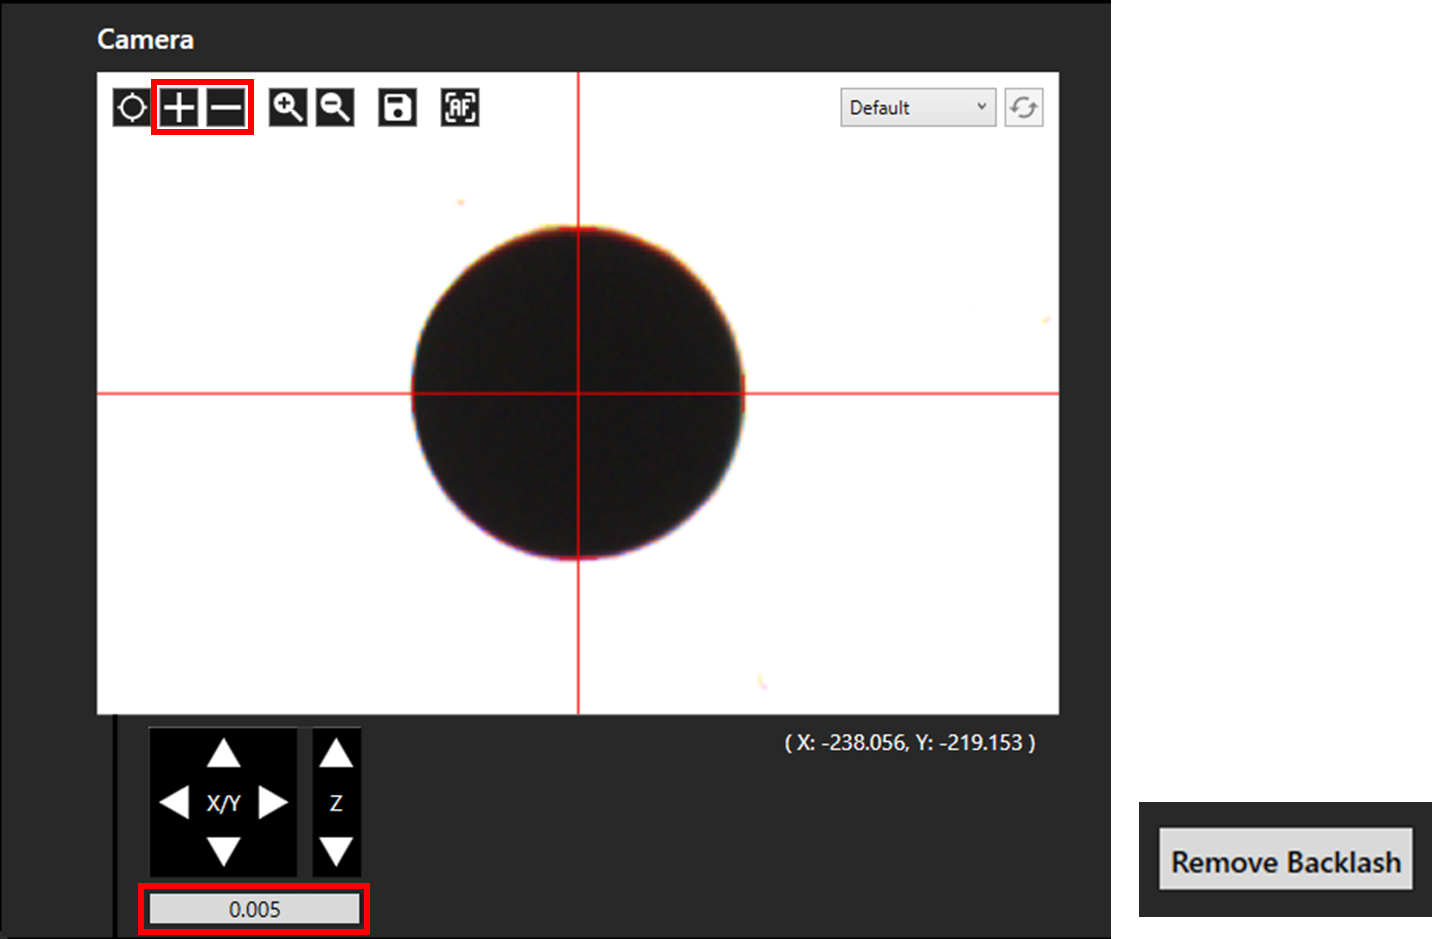
The camera will jog to the expected location of the first fiducial. If the automatic movement does not occur, click Jog to Fiducial 1. Auto Focus the camera (The SE12 does not feature an autofocus - it should already be in focus) then navigate to the first fiducial aperture by clicking on the camera image or with the X/Y pad. The scroll wheel can be used to zoom in and out.

Click on the question mark next to a chosen point to check the location of the fiducial.
Align the crosshair to the centre of the fiducial as shown below.
The size of the movement step can be adjusted for precise movement by typing below the X/Y pad. The size of the crosshair can be adjusted using the plus and minus buttons.
Note: When aligning with the SE12, click remove backlash after moving to maintain an accurate position. This should be done frequently, and especially immediately before clicking to set the fiducial, to ensure true alignment.
Select Set Fiducial 1. The camera will jog to the next fiducial. Repeat this process with each fiducial then click Continue to proceed.