TABLE OF CONTENTS
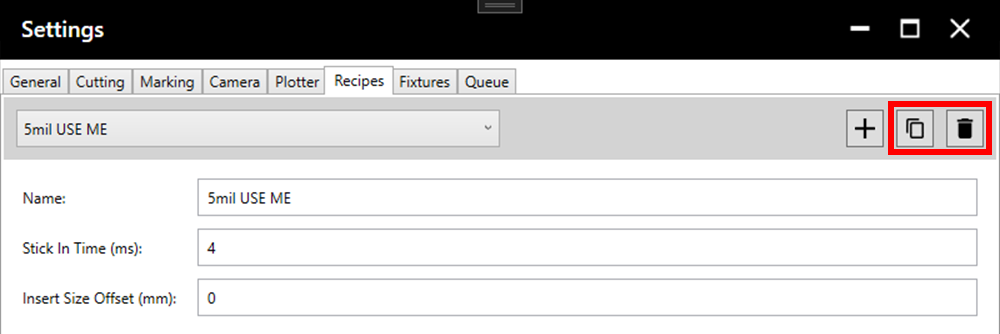
Note: It is recommended to duplicate a recipe before adjusting it to ensure old values are not lost until they are no longer needed. The spare recipe can always be deleted in the future.
1. Parameters
1.1. Standard Recipe Parameters
Standard recipe parameters are specific to each recipe. Access these in the recipe tab of the settings.

Stick In Time (ms): This parameter defines the time spent waiting for the laser to come up to power before cutting begins.
Insert Size Offset (mm): The offset applied when cutting inserts. This can be used to fine tune the size of inserts used for welding. For more detail see the Cutting Process article.
Linear Acceleration (ms): This parameter defines the time spent to accelerate to the set linear speed.
Linear Speed (mm/min or mm/s): This parameter defines how fast the laser will travel linearly.
Circular Acceleration (ms): This parameter defines the time spent to accelerate to the set angular speed.
Circular Speed (mm/min or mm/s): This parameter defines how fast the laser will travel on a circular path.
Z Position (mm): This parameter sets the Z position during cutting and is measured from the raised position. It is recommended to set this each time a stencil is loaded into the machine using the Z Height Calibration tool.
Duty Cycle (%): The percentage of time that the laser is on for the whole cycle (Duty Cycle = On Time/Period). It is best to adjust this parameter by changing the on and off times rather than directly. See section 1.2. Advanced Recipe Parameters.
Frequency (Hz): The number of cycles per second.
Laser Power (%): The percentage of total laser power applied.
1.2. Advanced Recipe Parameters
Advanced recipe parameters are specific to each recipe. Access these in the Recipes tab of the settings by clicking Toggle Advanced.
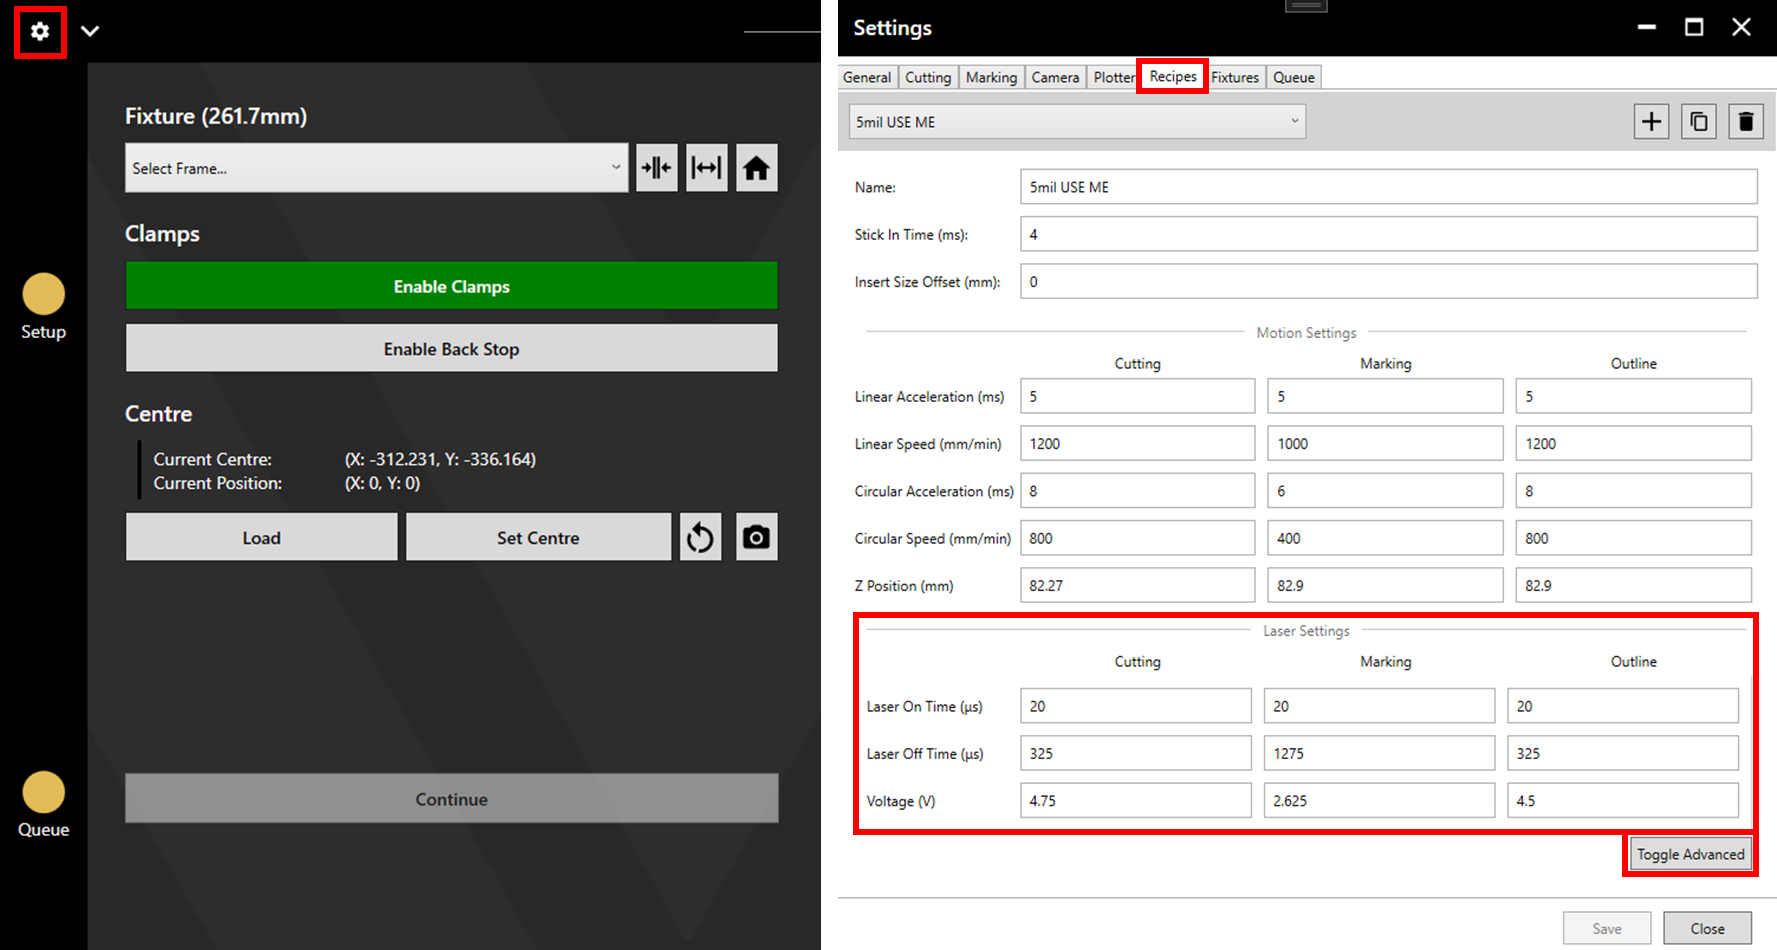
On Time (µs): The time that laser is on within one cycle.
Off Time (µs): The time that laser is off within one cycle.
Laser Power (V): This is the same setting as the Laser Power setting in section 1.1. Standard Recipe Parameters. The only difference being that here, it is set using the Voltage value rather than as a percentage. 100% translates to 5V, 40% to 2V, etc.
1.3. Global Cutting Parameters
Global cutting parameters affect all cutting recipes. Access these in the Cutting tab of the settings.
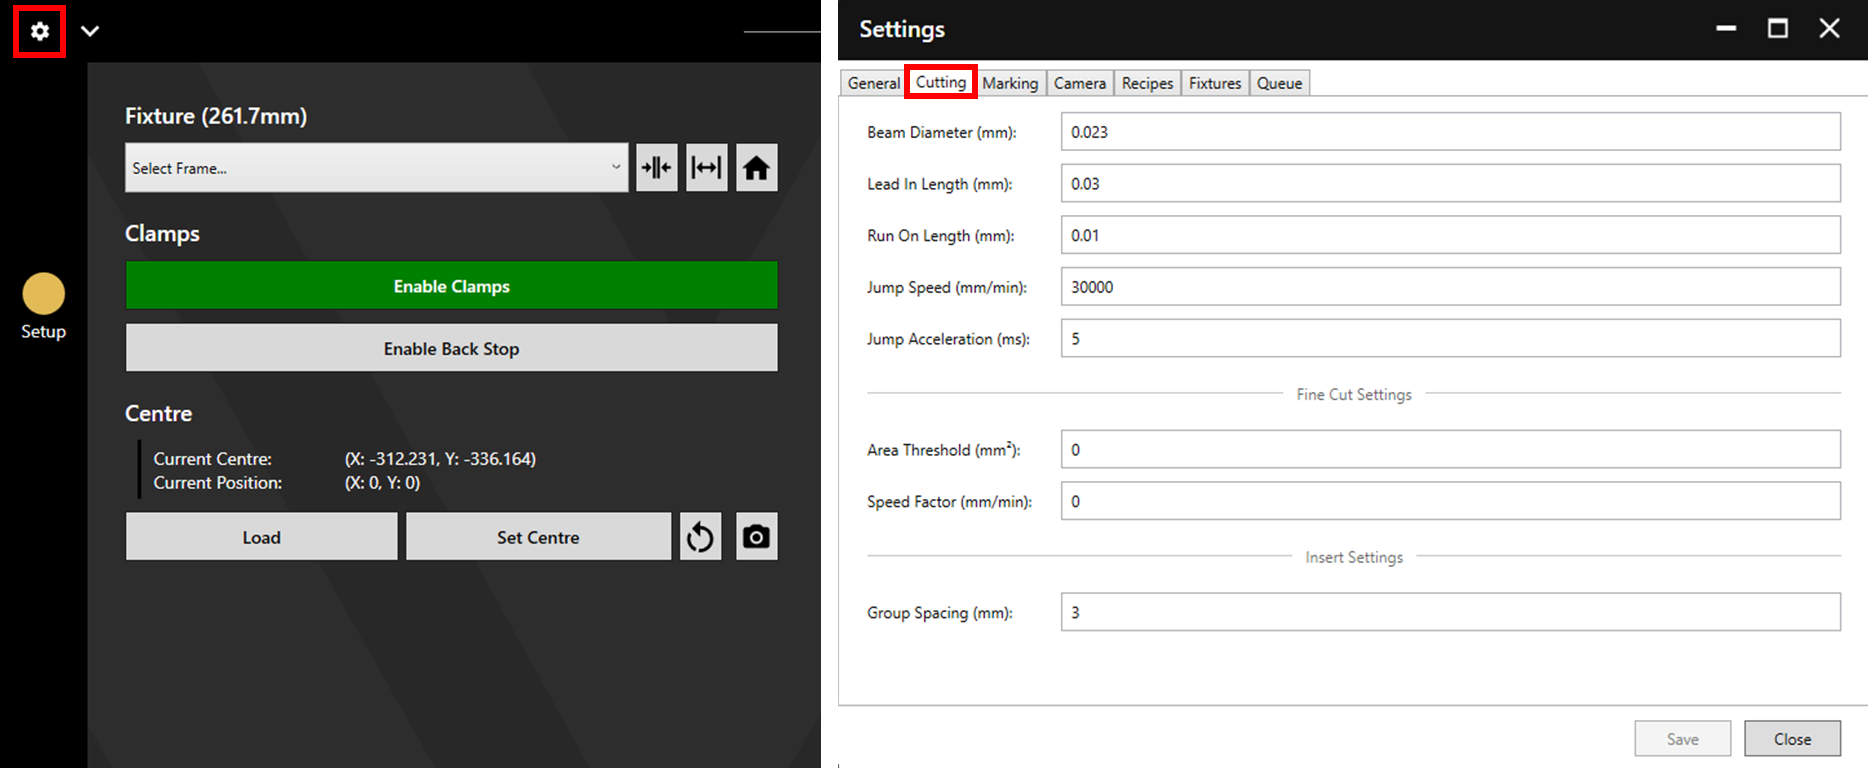
Beam Diameter (mm): The beam diameter controls the size of the offset applied during cutting to achieve accurately sized apertures. If making a change to this value, ensure that the original value is noted.
Lead In Length (mm): This value controls the distance travelled before the actual cutting path begins.

Run On Length (mm): This value controls the extra distance cutting continues after completing a shape (the extra distance cut is along the same perimeter as the rest of the shape).
Jump Speed (mm/min): This value controls the speed of movement between apertures.
Jump Acceleration (ms): This value sets the time taken for acceleration when moving between apertures.
Area Threshold (mm²): This value sets the threshold value at which a slower cutting speed will be used. For more detail, see the Fine Cutting article.
Speed Factor: This value is multiplied by the cutting speed within each recipe to define the slower cutting speed used beneath the area threshold. For more detail, see the Fine Cutting article.
Group Spacing: This value sets the distance between shapes when grouping inserts (see the Cutting Process article).
1.4. Dependent Parameters
Dependent parameters cannot be set but are determined by the set parameters.
Period (µs): The combination of the time that the laser is on and off to make one cycle.
Distance (mm): This is the distance travelled per cycle. (Distance = Period ∗ Linear Speed).
Beam Overlap (%): This is the overlap between the beam pulses (Beam Overlap = 100 - 100*Distance/Beam Diameter). This value plays a significant role in determining the presence of “bite marks” or a smooth cut. To achieve a smooth cut, beam overlap should be between 70% - 80%.
Average Power (W): The average power output during each cycle.
2. Suggested Limits
There are maximum/minimum values that should be used, outside of which a good quality cut is unlikely.
On Time: On time should generally be greater than or equal to 20µs.
Frequency: Frequency should generally be less than 3000Hz.
Beam Overlap: Beam overlap should be between 70-80%.
Duty Cycle: Duty cycle should not generally surpass 10%.
3. Suggested Process
3.1. First Recipe
Load a stencil with a standard thickness (around 120 micron/ 5 mil) and conduct Z height calibration.
Create a recipe with the following values:
| Parameter | Value |
| Linear Acceleration | 6 |
| Linear Speed | 1200 |
| Circular Acceleration | 6 |
| Circular Speed | 1200 |
| On Time | 25 |
| Off Time | 315 |
| Power | 40% |
Attempt to cut a small test file.
When cutting test files it is useful to use a file centred around (0, 0) and the Set Centre feature to vary the cutting location throughout testing.
3.1.1. Power and On Time
If this recipe fails to cut, steadily increase the Power parameter until cutting through.
If this recipe cuts through first try, reduce On Time until the recipe fails to cut, then increase again until the recipe cuts reliably.
3.1.2. Cut Quality
Use a microscope, the QC100, or the SE12 Pro to check the quality of the cut edge. If the edge quality is good, leave the recipe as it is.
Jagged Edges: If cuts appear jagged or with bite marks, the beam overlap may be outwith the suggested limits and/or the power supplied may need reduced.
Hangers: If a significant number of apertures are left with hangers, power and/or the run on length may need increased slightly.
Burnt Edges: If the cuts appear burnt, the power/on time may need reduced.
Shape: If the shape of the aperture is distorted, there may be a problem with the data (check the data then contact Watt Laser by Creating a Support Ticket). If it is a small shape, speed may need reduced, the best way to do this is using Fine Tuned Cutting to allow large apertures to cut quickly, and small apertures to cut more slowly.
Failure to Cut Through: If the apertures are not cut, Power/ On Time may need increased. Alternatively, if any parameters are outwith the Suggested Limits the resulting unreliable output could cause failure to cut.
Aperture Too Big/Small: Ensure the correct layer assignment has been used (See the Cutting Process article) and that the data and measurement are correct. If the cut is flawed in any other way, fix the other issue first as this may also fix the size issue. If everything else is fine, adjust Beam Diameter.
3.2. Adjusting Recipes for a New Thickness
3.2.1. Basics
Once a good recipe is created for one thickness, adjusting it for a different thickness is generally simple.
To create a recipe for cutting thicker material, raise the power value until the recipe cuts the relevant thickness reliably.
To create a recipe for cutting thinner material, reduce the power value until the recipe fails to cut the relevant thickness then steadily increase.
As a rough rule, the change in power required is directly proportional to the change in thickness. For example, if 80% power is required to cut a 200 micron stencil, then the power required to cut a 100 micron stencil will be around (80/200)*100 = 40%.
This is not an exact rule and some further adjustment may be required.
3.2.2. Advanced
At the outside extremes of thickness, further adjustment may be required.
Thicker Material
When adjusting a recipe to suit a thicker material, changing the power value alone may not be sufficient. If after increasing power to 100% the recipe does not cut through, the average power over the duration of each cycle must be increased by other means.
This can be done by increasing On Time or reducing Speed.
Thinner Material
When adjusting a recipe to suit a thinner material, changing the power value alone may not be sufficient. If after decreasing power to the minimum, the recipe is still too aggressive, the average power over the duration of each cycle must be decreased by other means.
This can be done by decreasing On Time or increasing Off Time.
3.3. Adjusting Recipes for a New Speed
It is recommended to create recipes at the greatest desired speed, then use the Fine Tuning Cutting feature to cut at slower speeds. The linked article also includes a calculator to help move recipes between different speeds.
In general, adjust the Off Time such that the change in frequency is proportional to the change in speed.