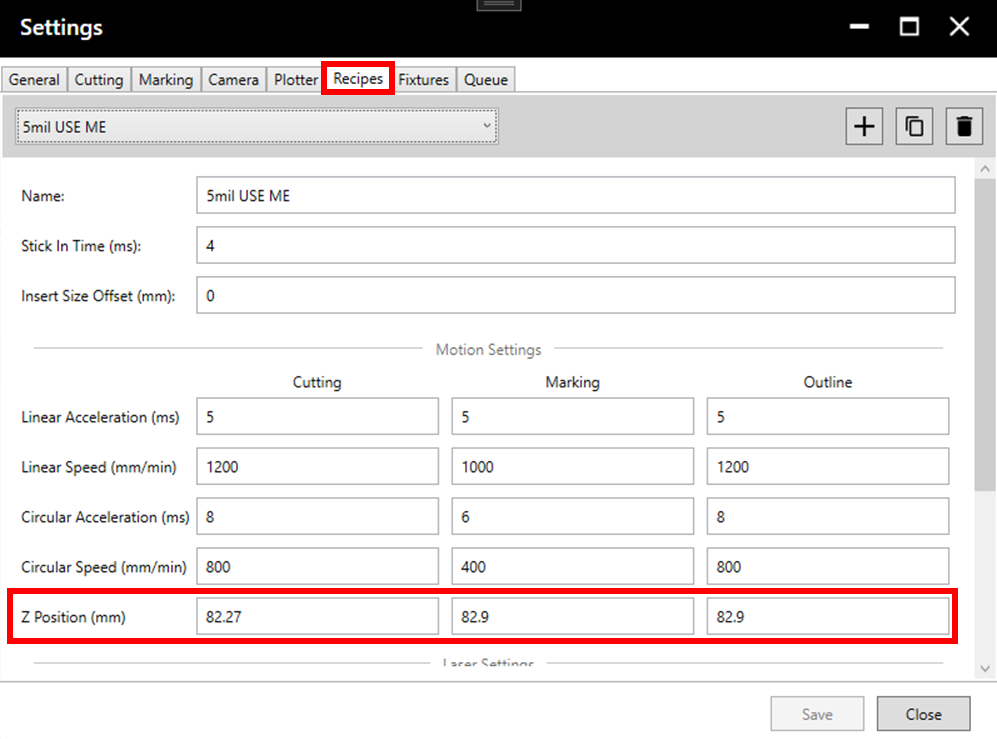
If setting Z height for the first time, it is possible that the value is significantly different from what it should be. In this case, it is recommended to enter Settings > Recipes and change the Z height value to a low value (20-40) before running Z height calibration to avoid damaging the stencil and laser head.
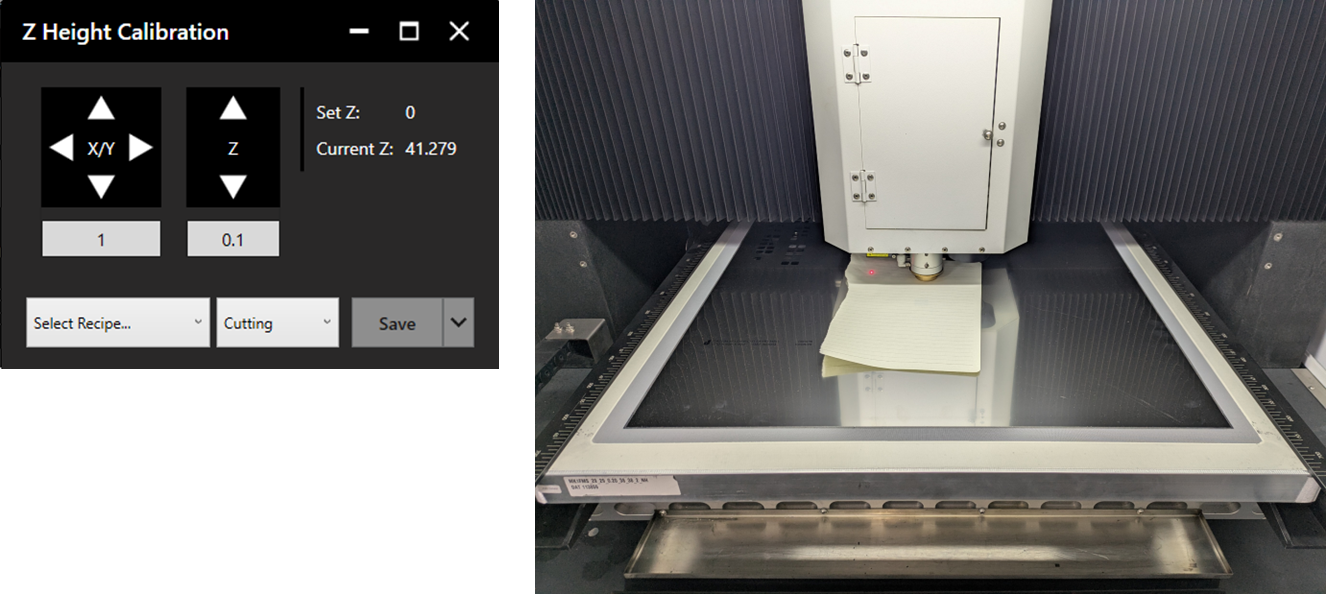
Load the stencil into the machine and enable the clamps. In the WattCut application, click on the dropdown menu in the upper left corner and select Z Height Calibration.

The Z Height Calibration window will open. Select the desired recipe and process. The head will lower to the previously set Z height.
Place a sheet of paper between the nozzle and the stencil. Adjust the Z height until the paper is held only very lightly by the nozzle. Pulling on the paper, there should be only slight resistance.
Once positioned correctly, click Save.
Z height values can also be found and adjusted in Settings > Recipes.