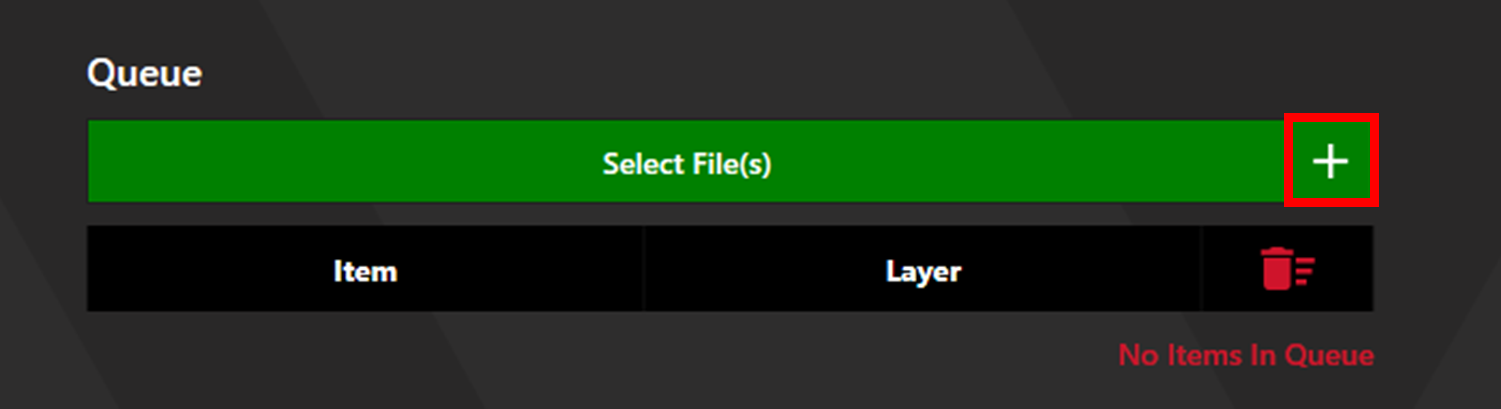
Add the desired marking files to the queue by clicking Select File(s) or create them from Unique Item Select and set the appropriate layer and marking recipe.
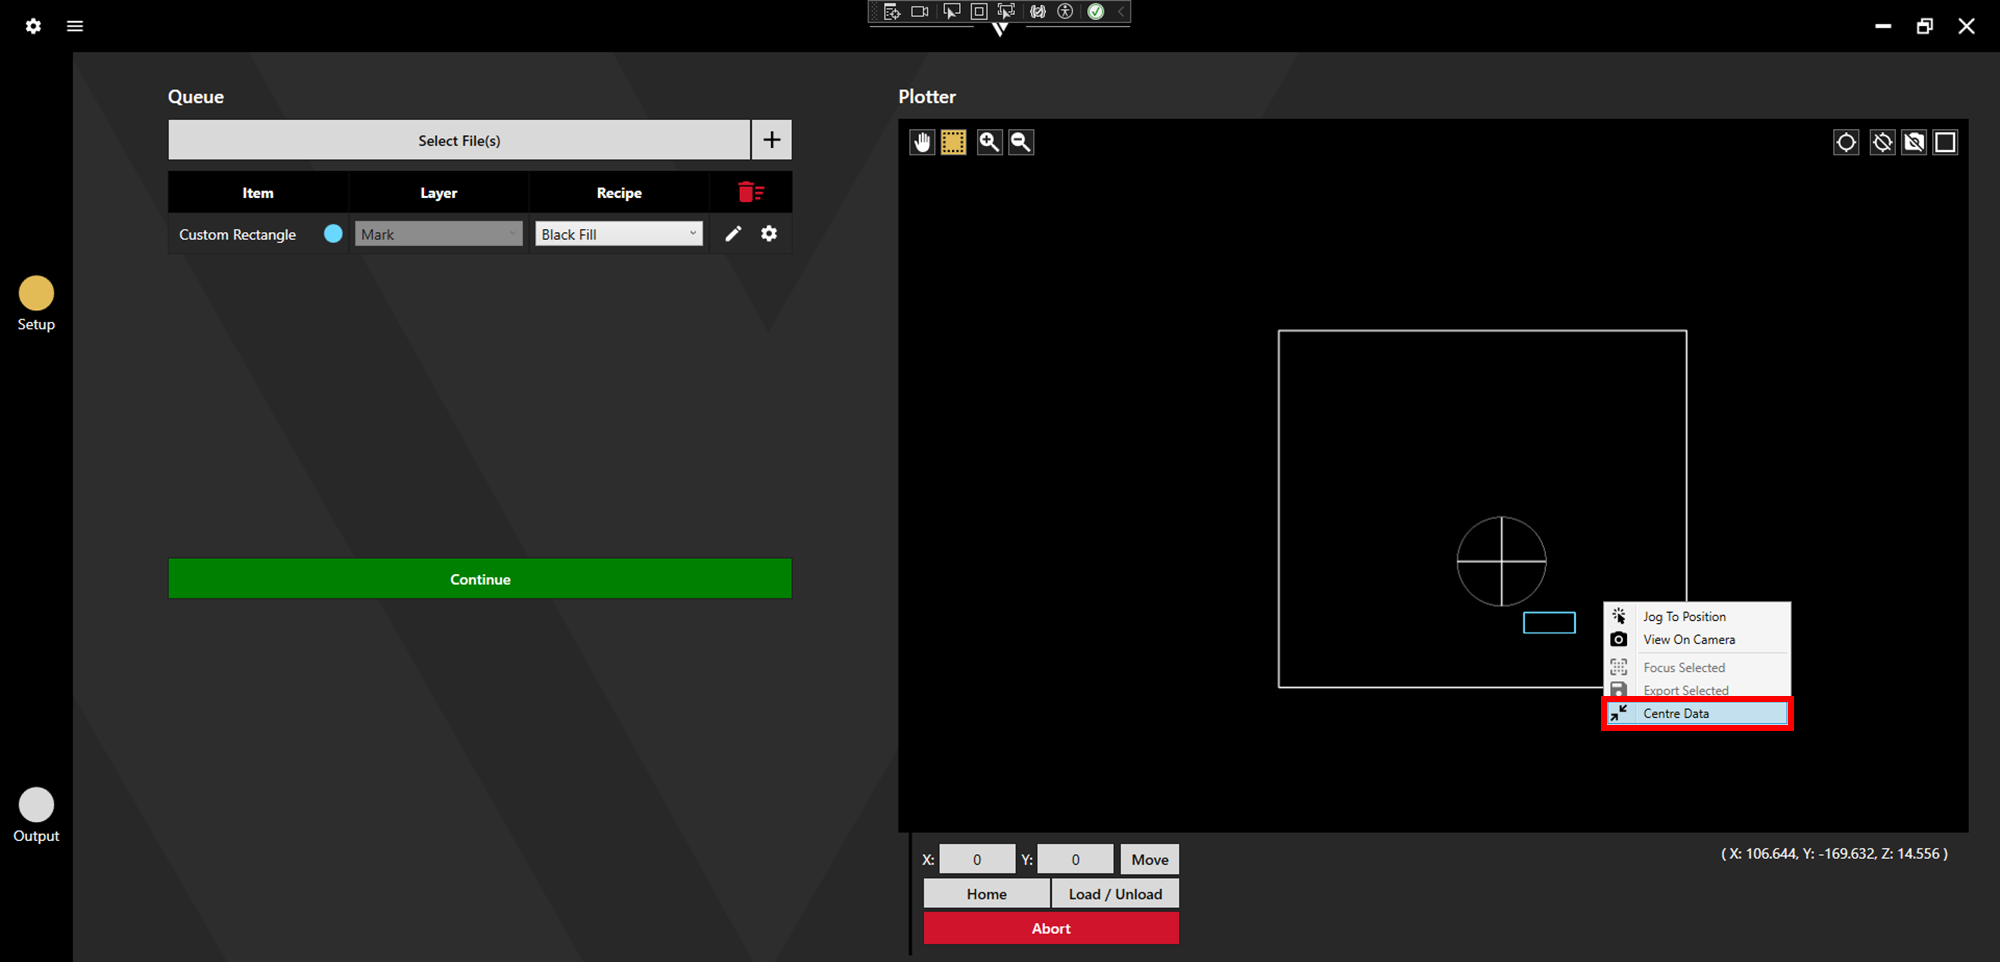
This process works best when the marking data is centred on 0, 0. If this is not already the case, right click on the plotter and select Centre Data.
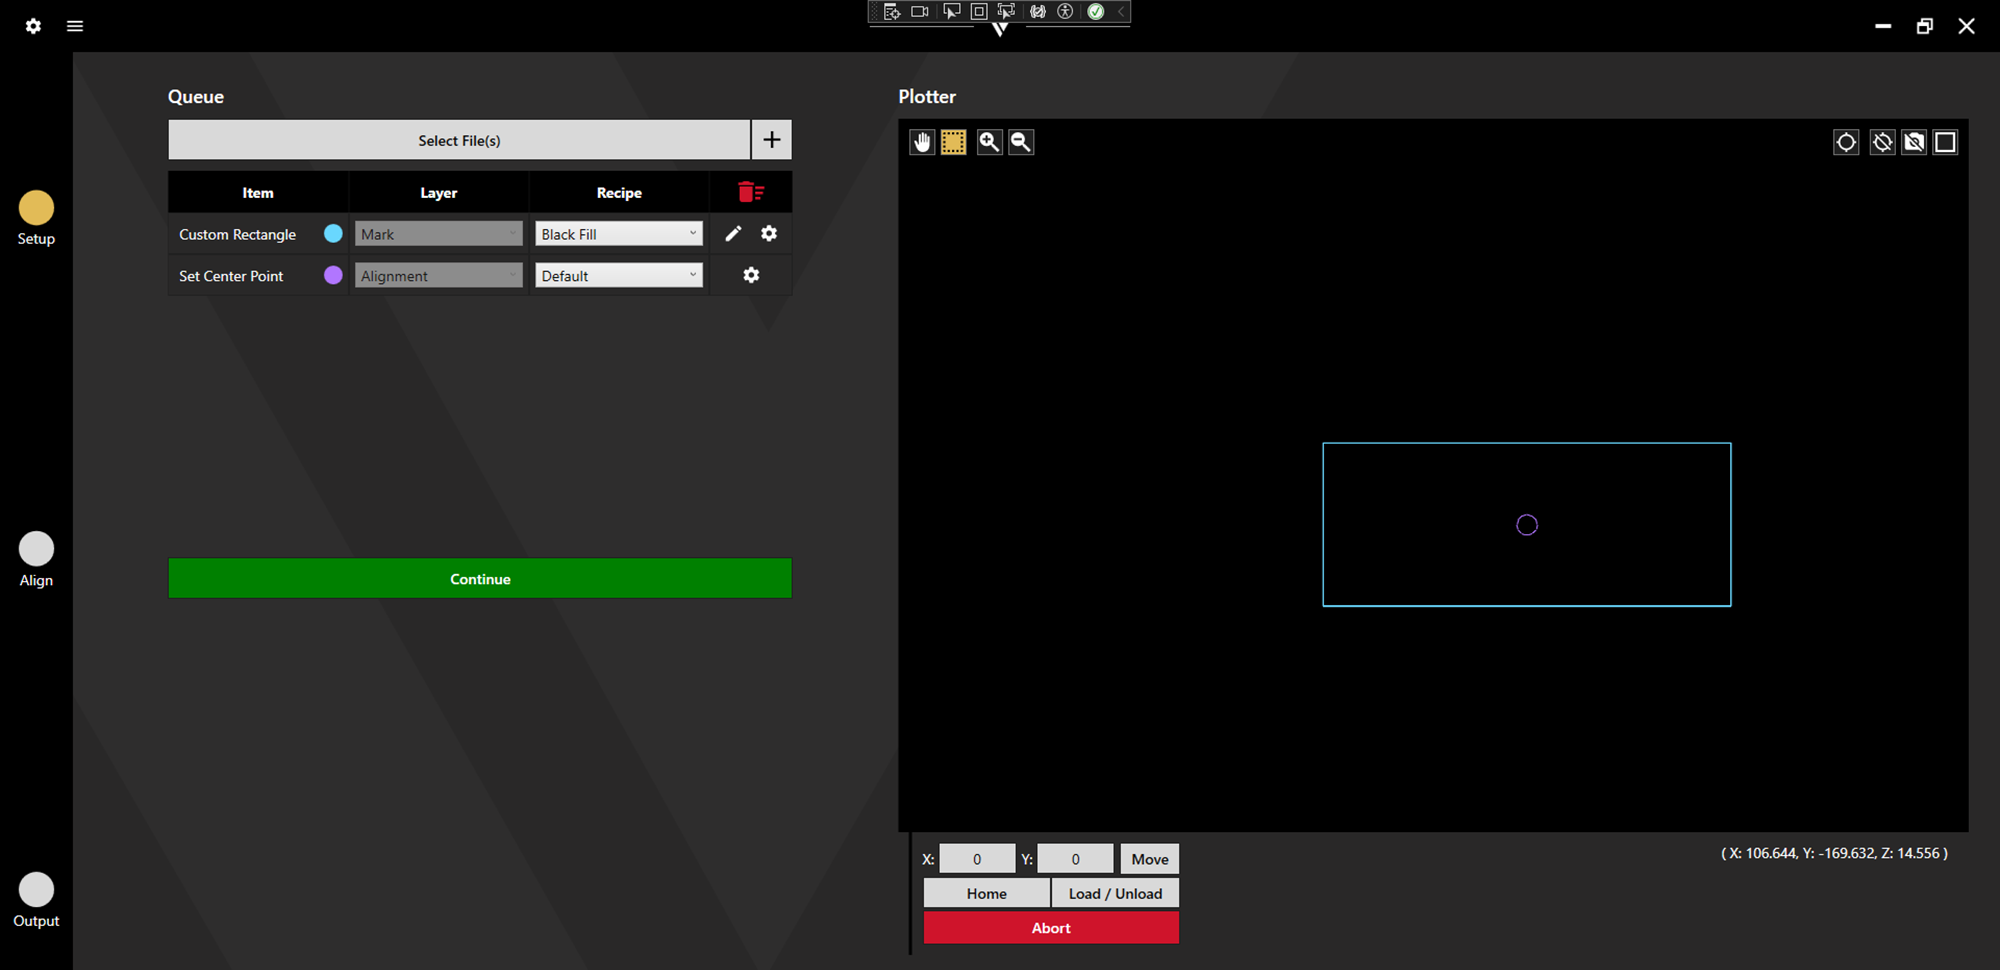
Click the plus button next to the Select File(s) button to access Unique Item Select, then choose Set Centre.

This will generate an alignment point at 0, 0. If the marking files are centred around 0, 0, the alignment point should sit in the centre of the data on the plotter. Click continue to proceed to alignment.
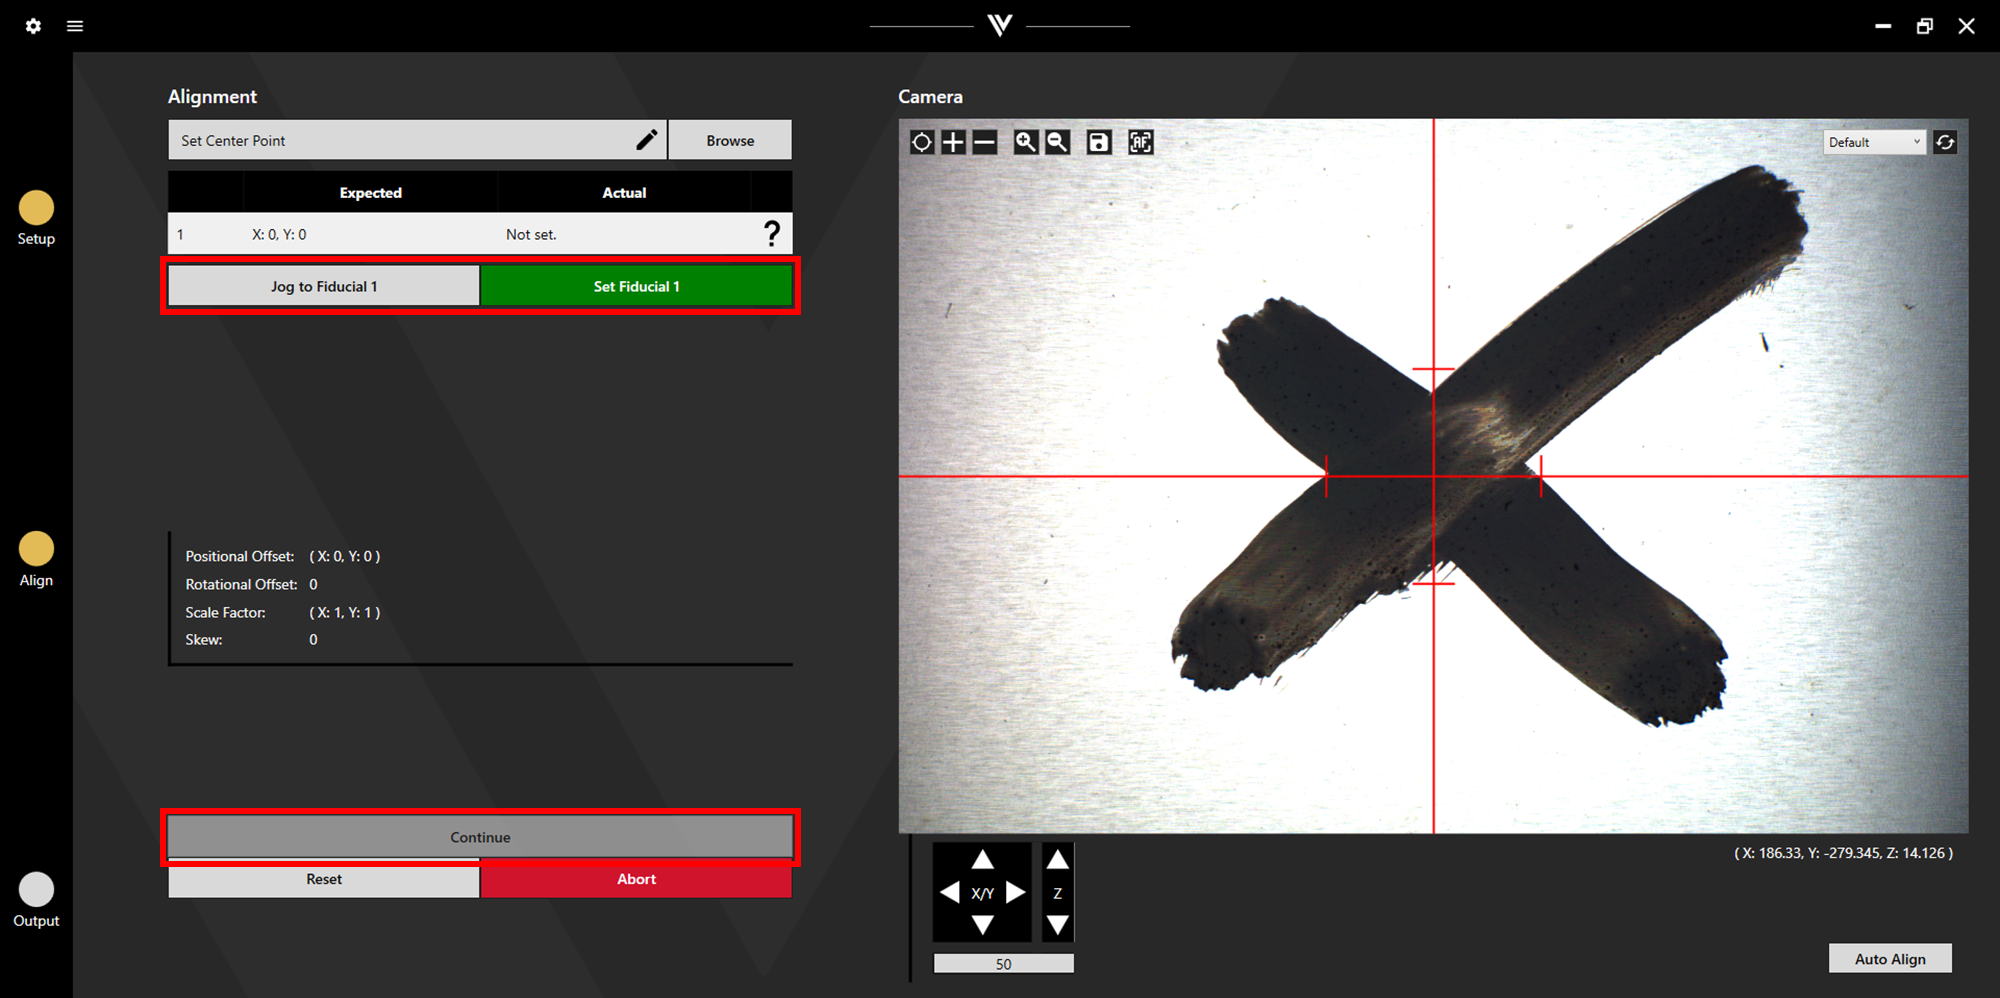
Click Jog to Fiducial 1. This will position the camera over the centre of the stencil. Move the camera over the area for marking. This can be done by eye, or by aligning to a marked location on the stencil. Click set Fiducial 1, then Continue to proceed to output.
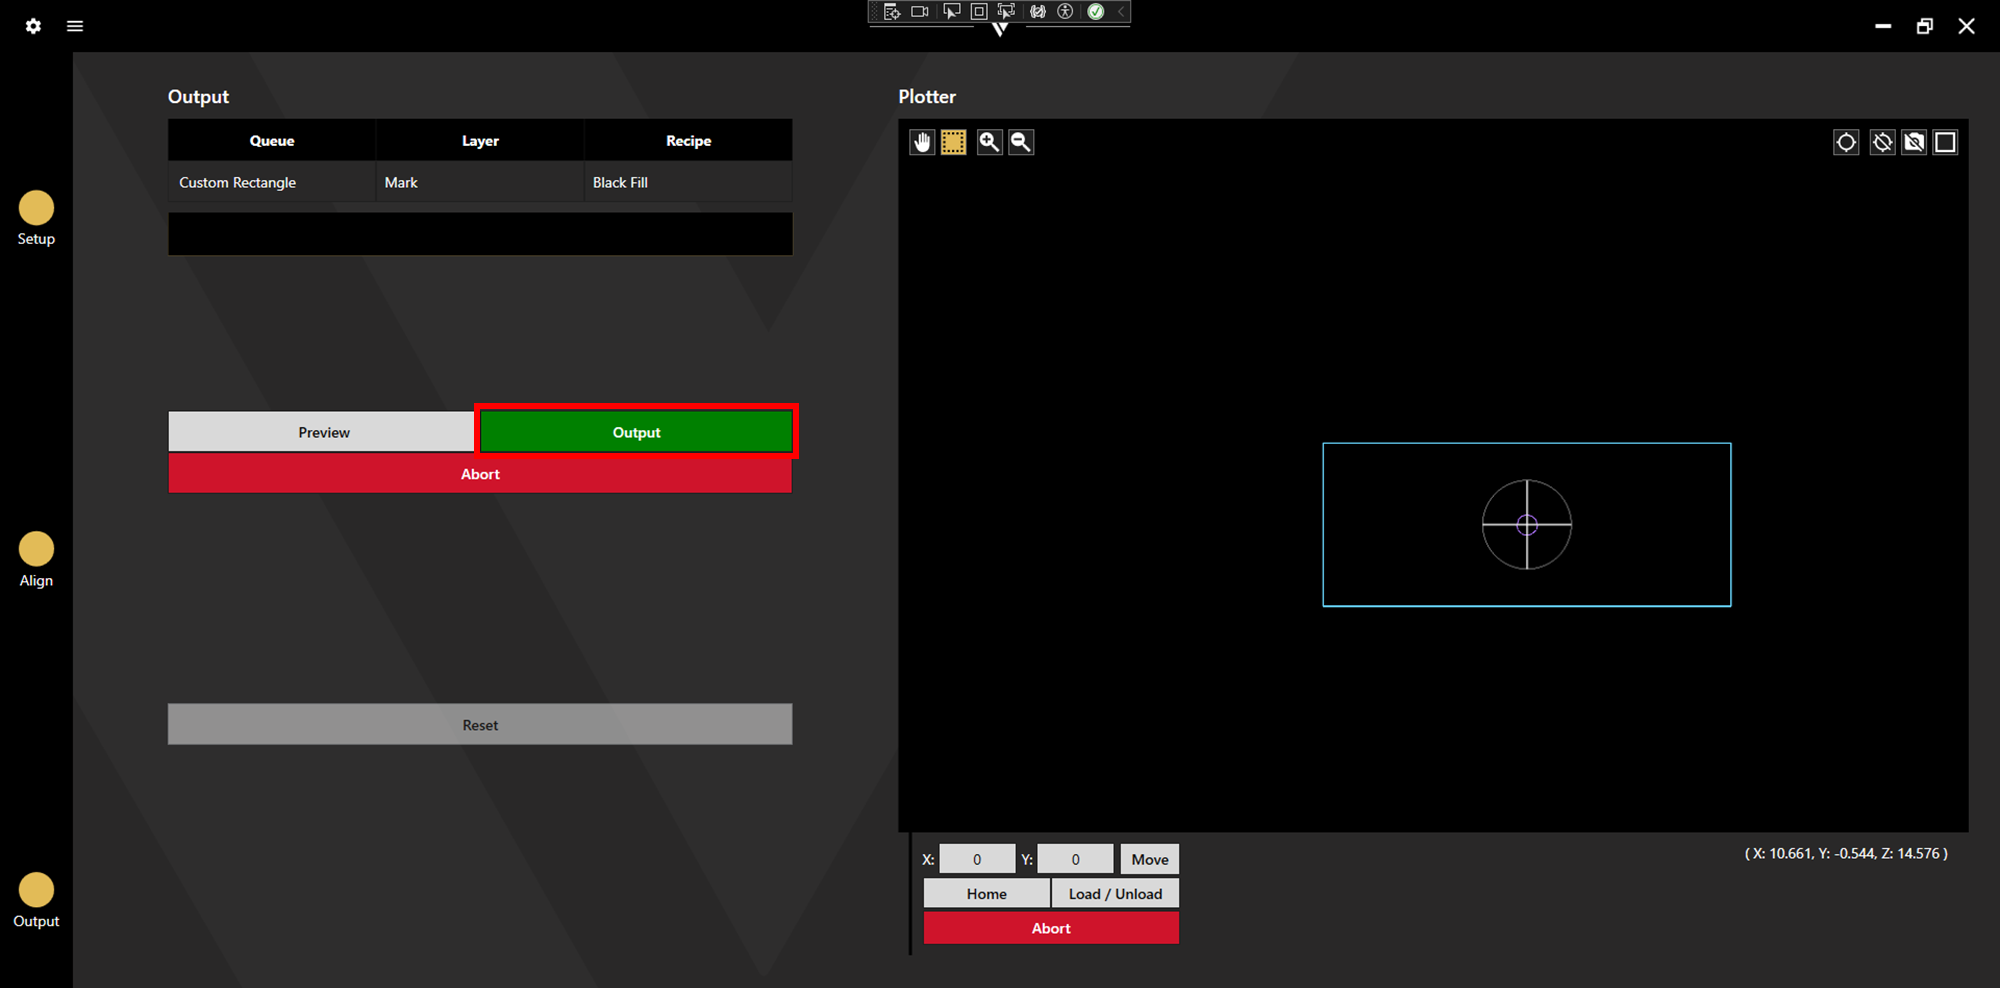
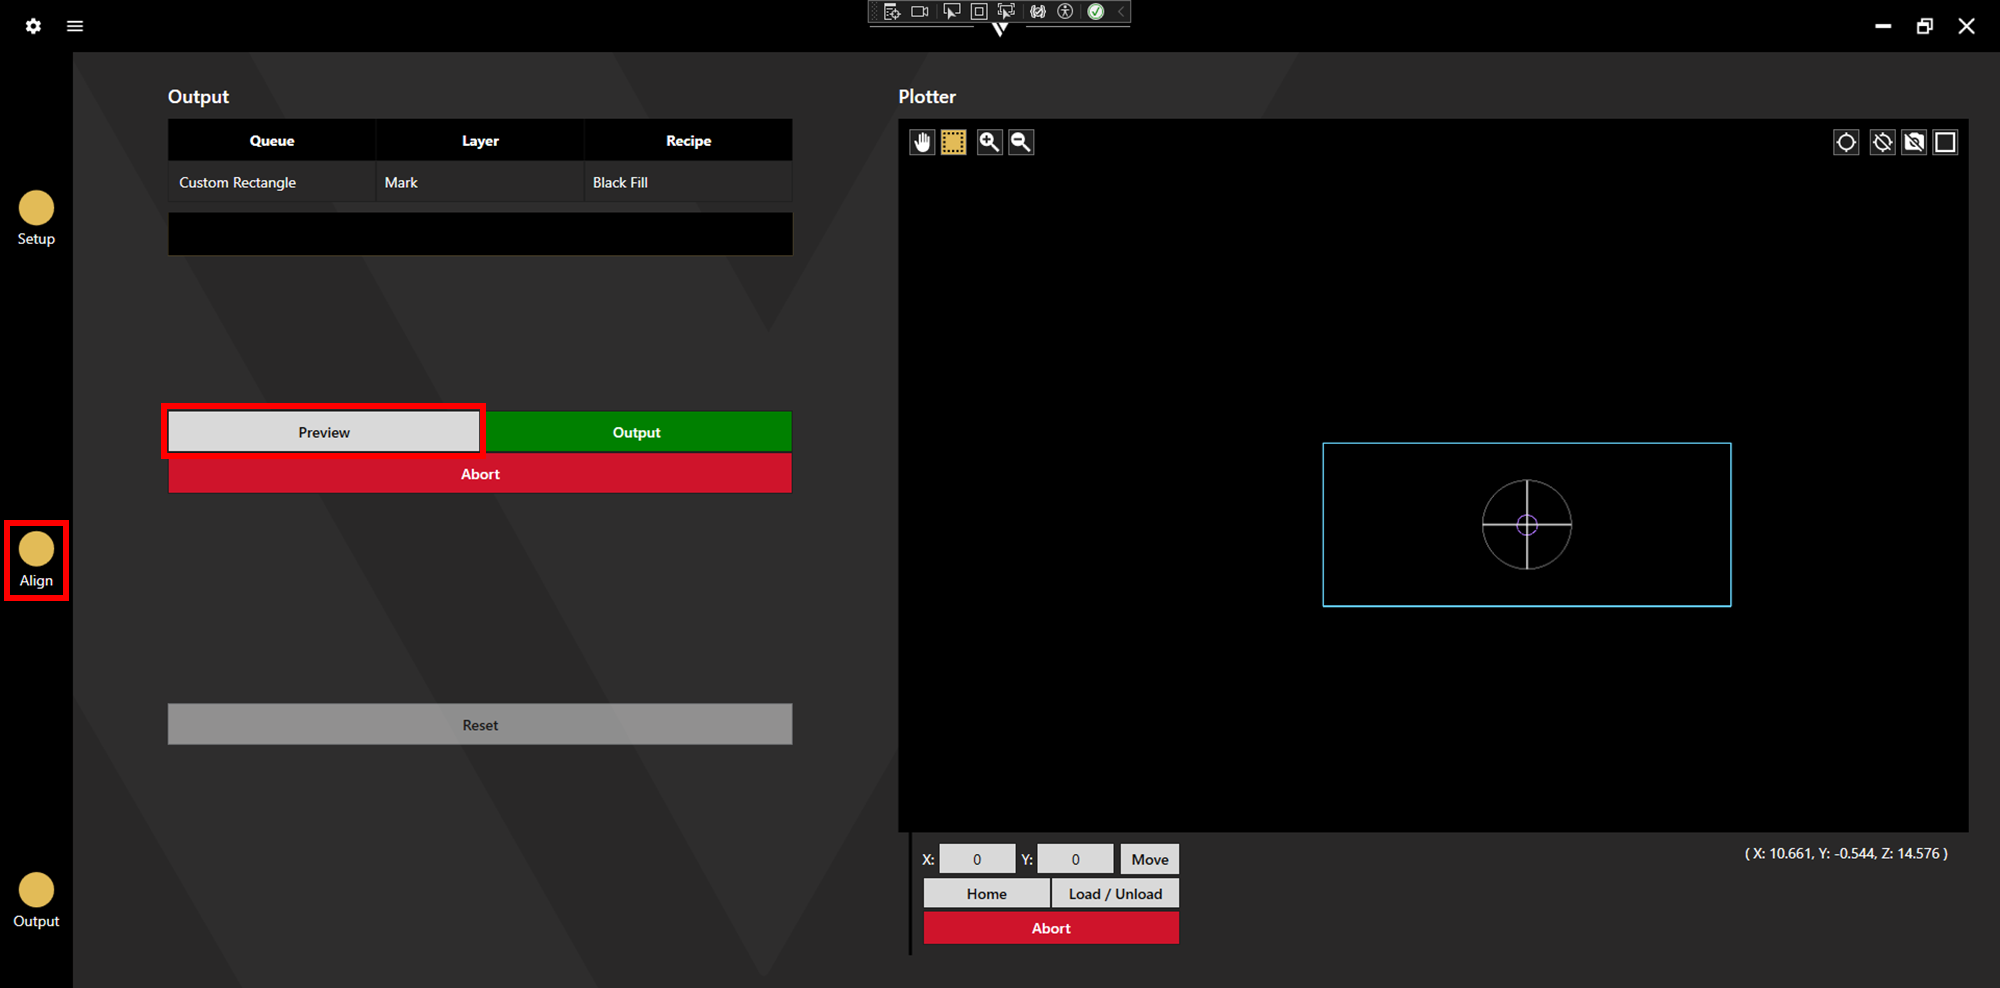
Click Preview to check the marking location is correct. If it needs adjusted, click the circle above Align to return to alignment.
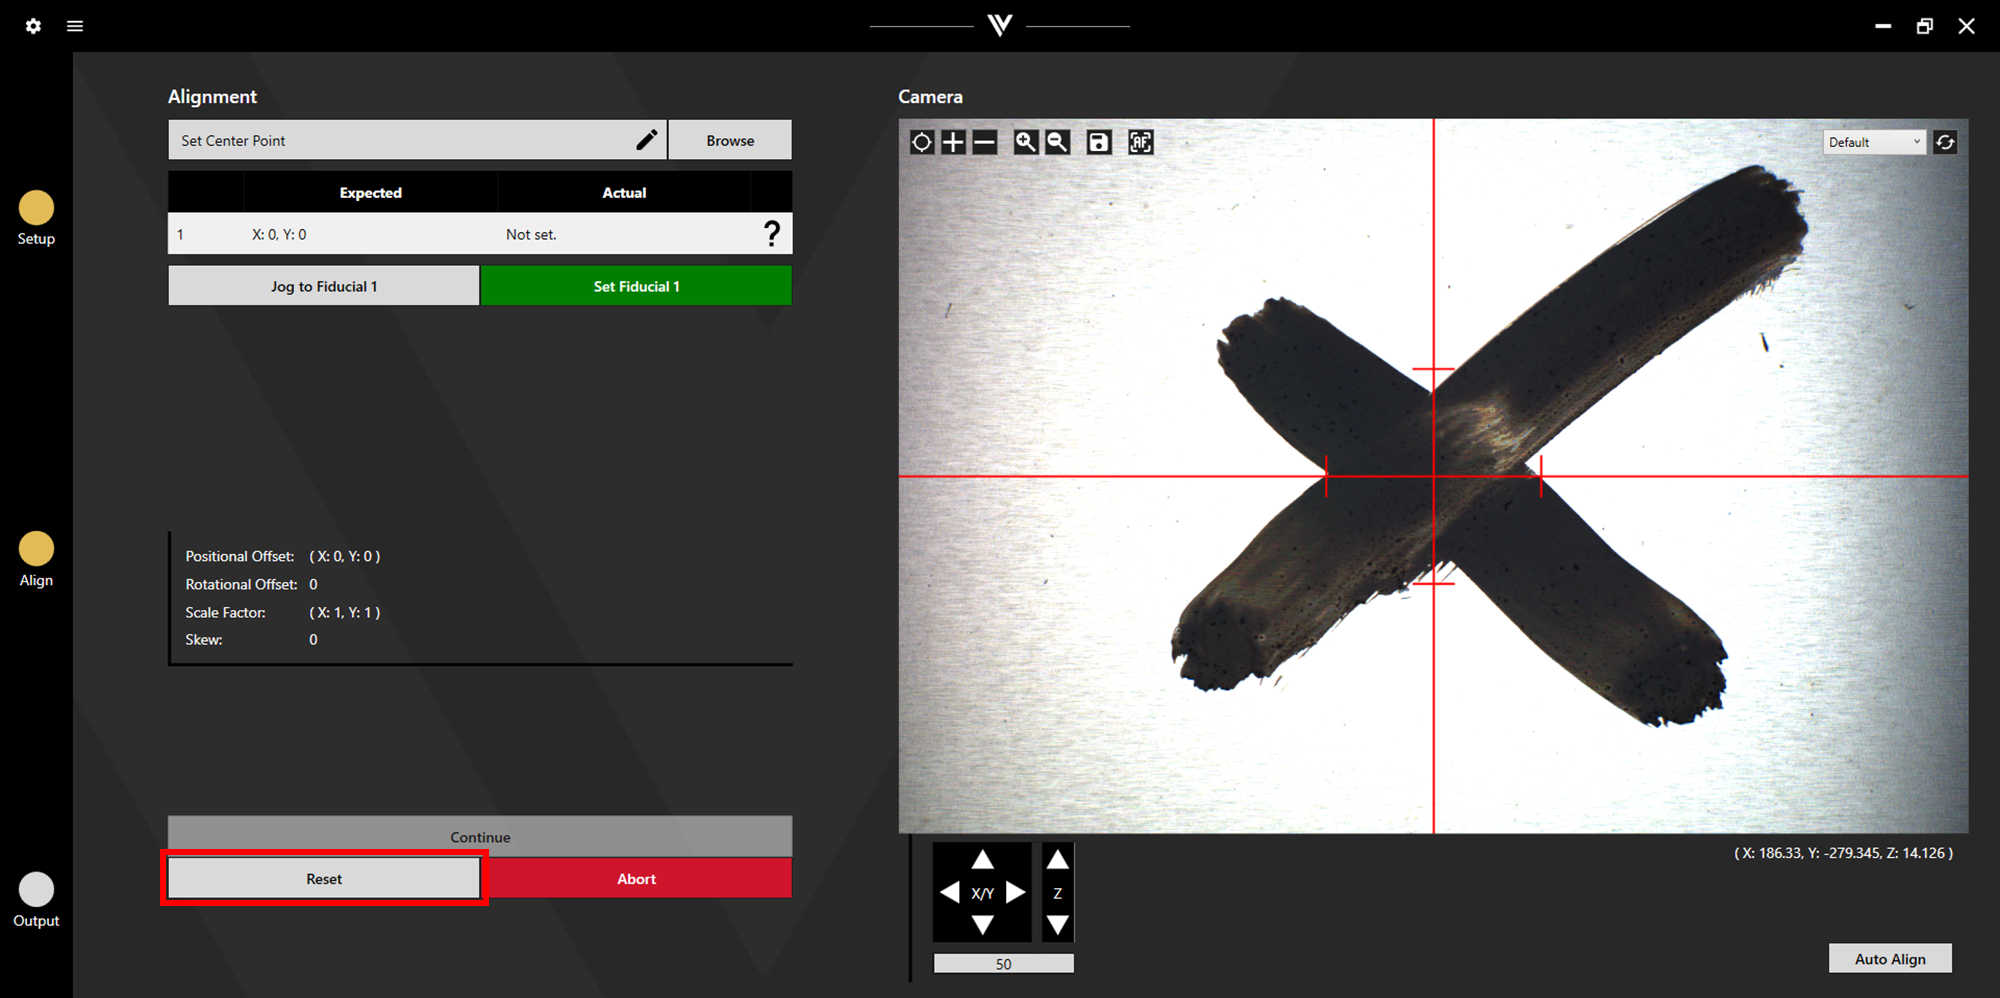
Click Jog to Fiducial 1 to return to the previous alignment point, then click Reset to clear the old set point. Make the required adjustments then click Set Fiducial 1 and Continue to return to output.
Once the preview shows the correct position, click Output to begin marking.