
TABLE OF CONTENTS
- 1. Frequency Table
- 2. Inspection of Lens/Cleaning
- 3. The Vacuum Plate
- 4. Rubber on the Table
- 5. Vacuum Generator
- 6. Damage Reporting
1. Frequency Table
| Area for Inspection | Frequency |
| Remove Dust from Rubber Cord | Weekly |
| Cleaning of machine (IPA) | Weekly |
| Cleaning of lens | Weekly or after heavy marking/structuring or high volume of welding. |
2. Inspection of Lens/Cleaning
- Ensure the machine is turned off.
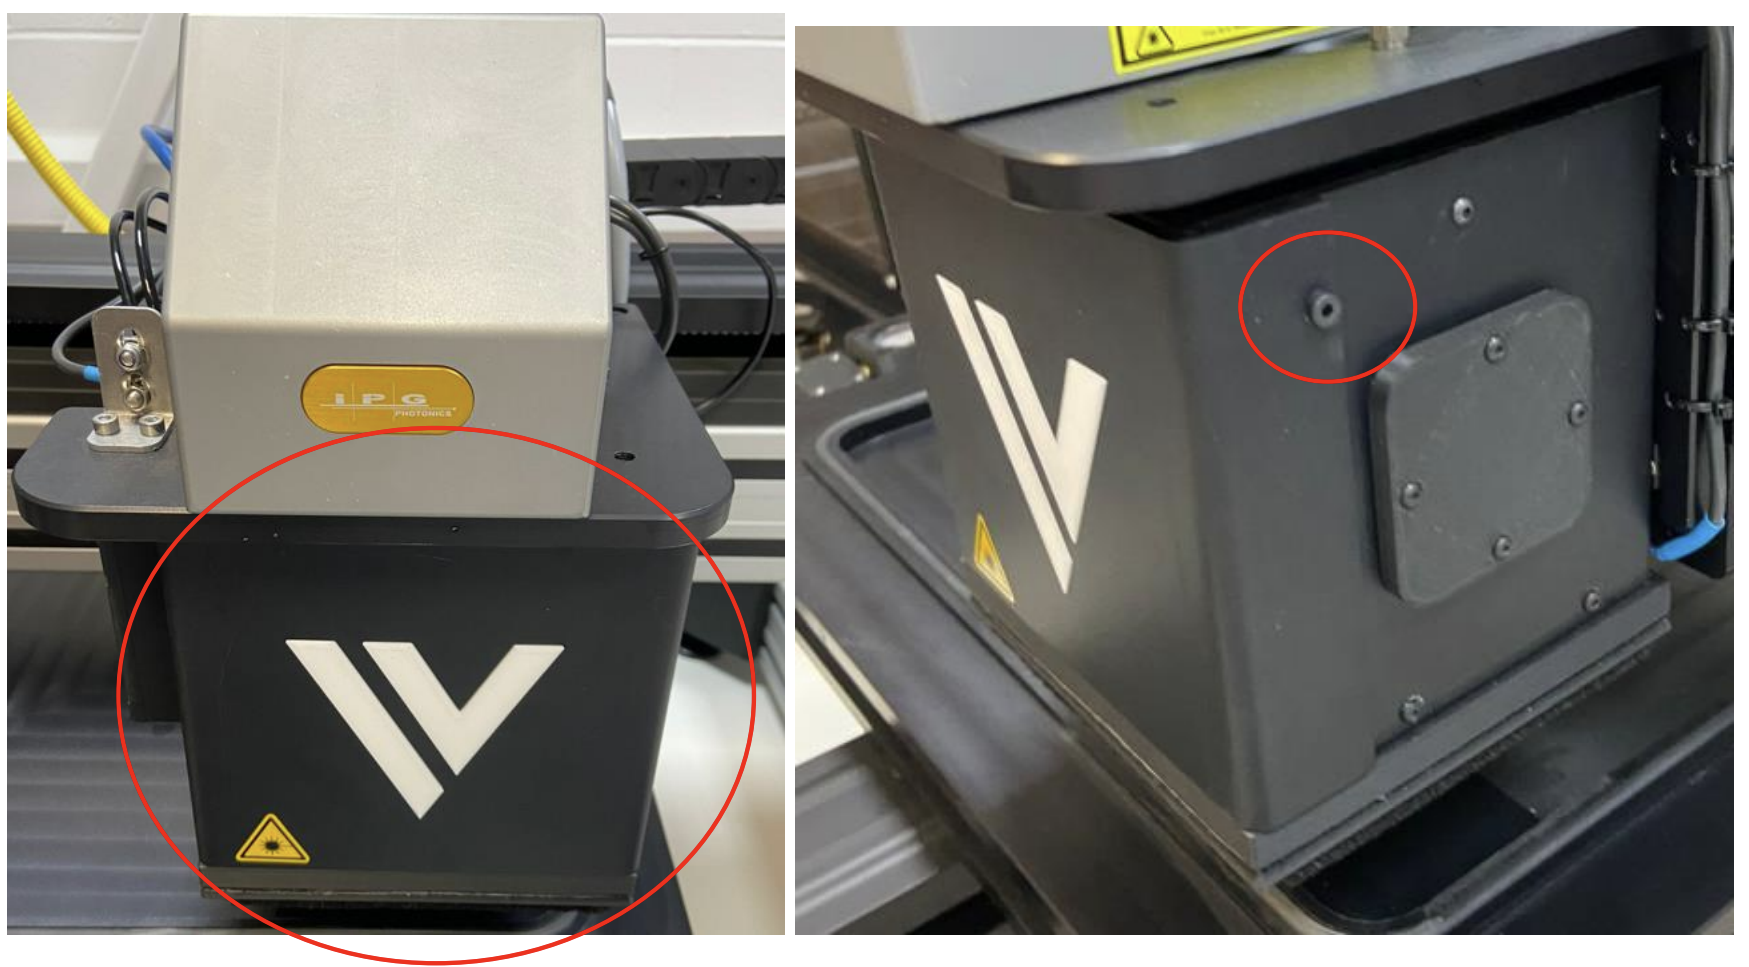
- Remove the front of the laser shroud using an Allen key.
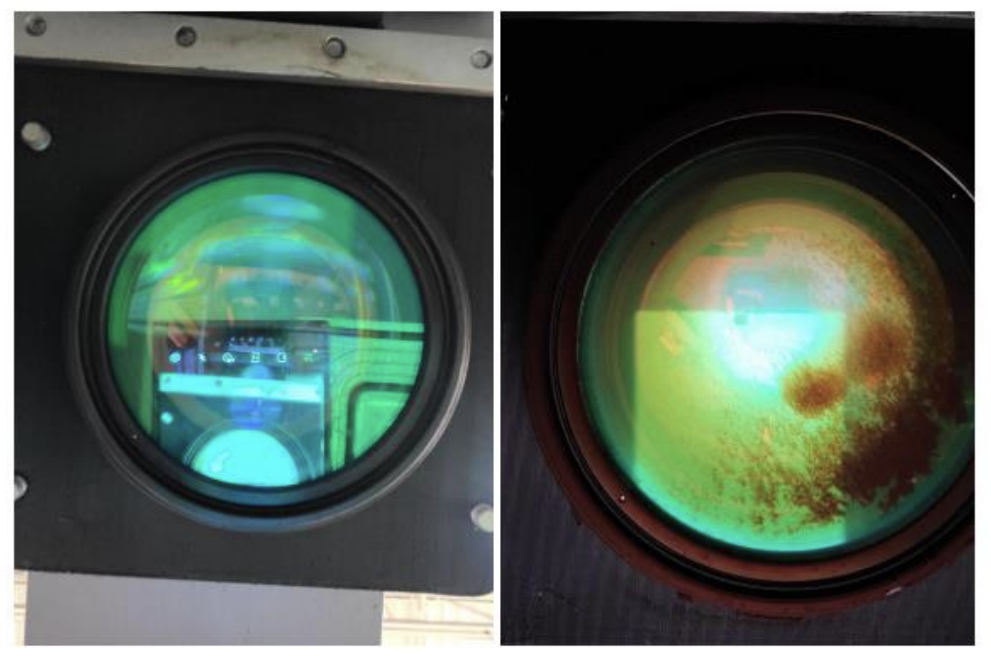
- Use a camera to inspect the lens. The lens on the left is clean the one on the right is not.
- Using the wipes provided, gently wipe the lens. Avoid your fingers touching the lens. USE EXTREME CARE.
3. The Vacuum Plate
- Care should be taken to not structure, weld, or mark the vacuum plate.
- If a weld goes through the stencil and damages the vacuum plate, ensure that any burrs/burns are flattened or removed using a blade or fine sandpaper.
4. Rubber on the Table
- If the rubber looks badly damaged over time, it should be removed and replaced with the spare rubber strip provided. This can be secured by using small spots of glue around the groove that the table sits in. Please make a support ticket before carrying out this procedure so that help can be provided. See the Creating a Support Ticket article for more detail.
- If the vacuum is not pulling as well or is inconsistent, replacing the rubber may help.
5. Vacuum Generator
- The silencer on the vacuum generator can be replaced if it becomes ineffective. It is a simple threaded piece that can be taken off and replaced. Spares are provided with machine.
6. Damage Reporting
Any damage to the machine should be reported as a ticket. Please see the Creating a Support Ticket article.