
The required files for stage calibration are attached at the bottom of this article.
Cut the CompTable.1 file then load the cut stencil onto the machine requiring calibration.
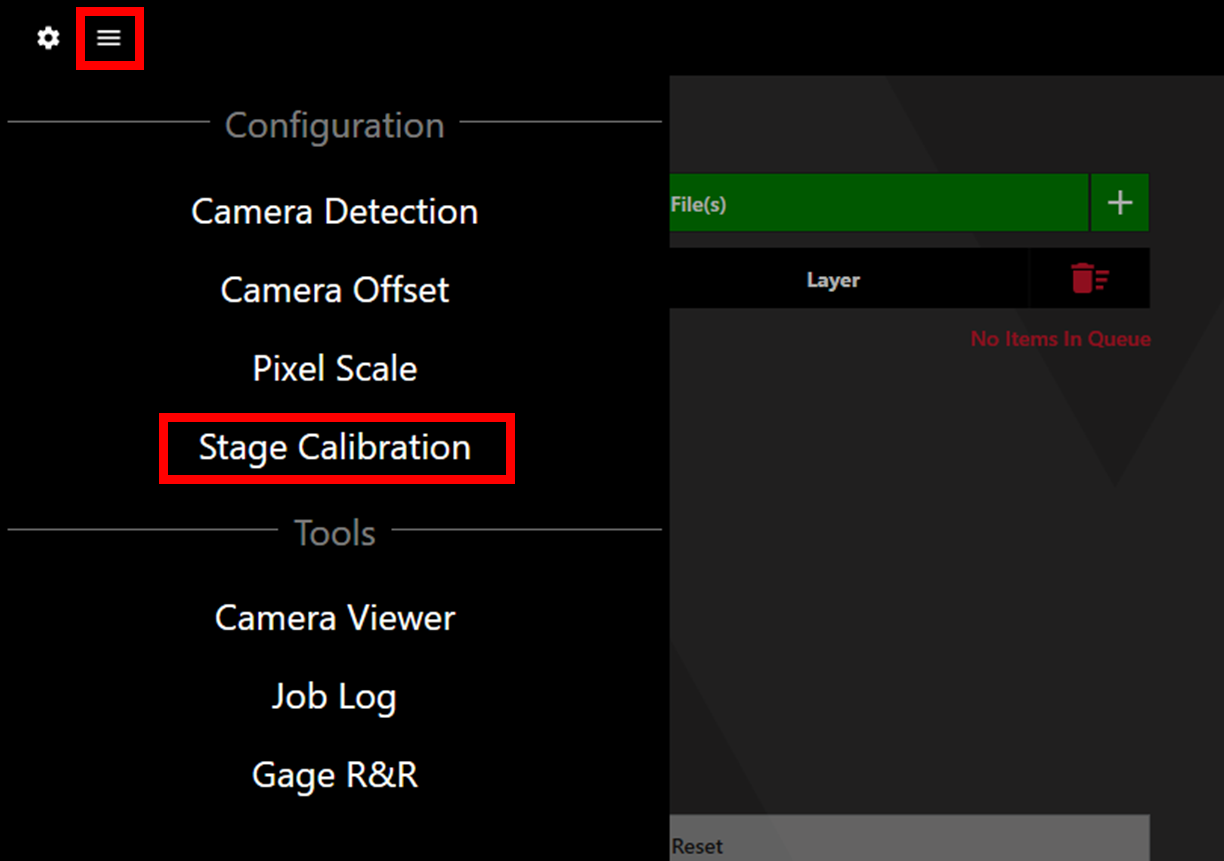
In the Watt Laser Suite app click on the menu button in the upper left corner and select Stage Calibration.
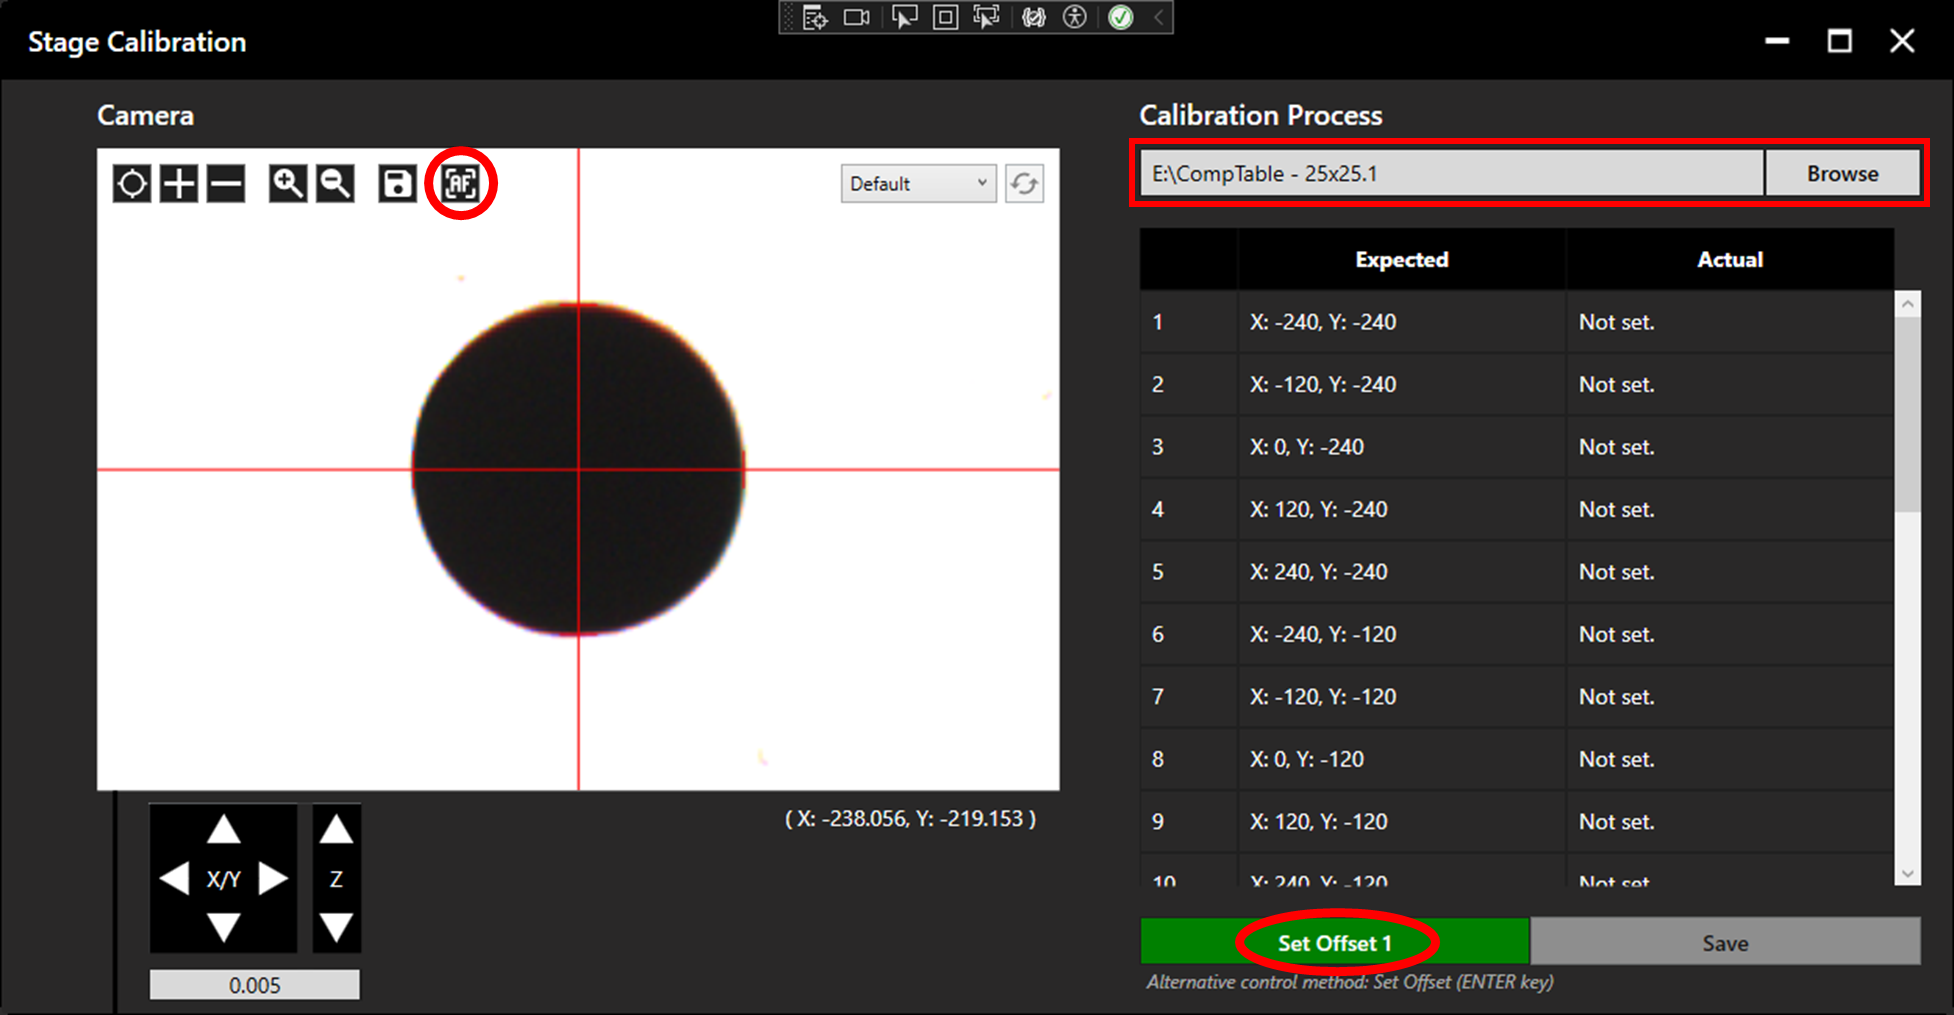
The Stage Calibration window will open. Autofocus if required (QC100 and SE12 Pro). Click browse and load in the CompTable - 25x25.1 file.
Align to the bottom left aperture, then click Set Offset 1. The camera will automatically move to the next aperture. Continue aligning to each of the 25 apertures, clicking Set Offset after each alignment. More detail on alignment can be found here.
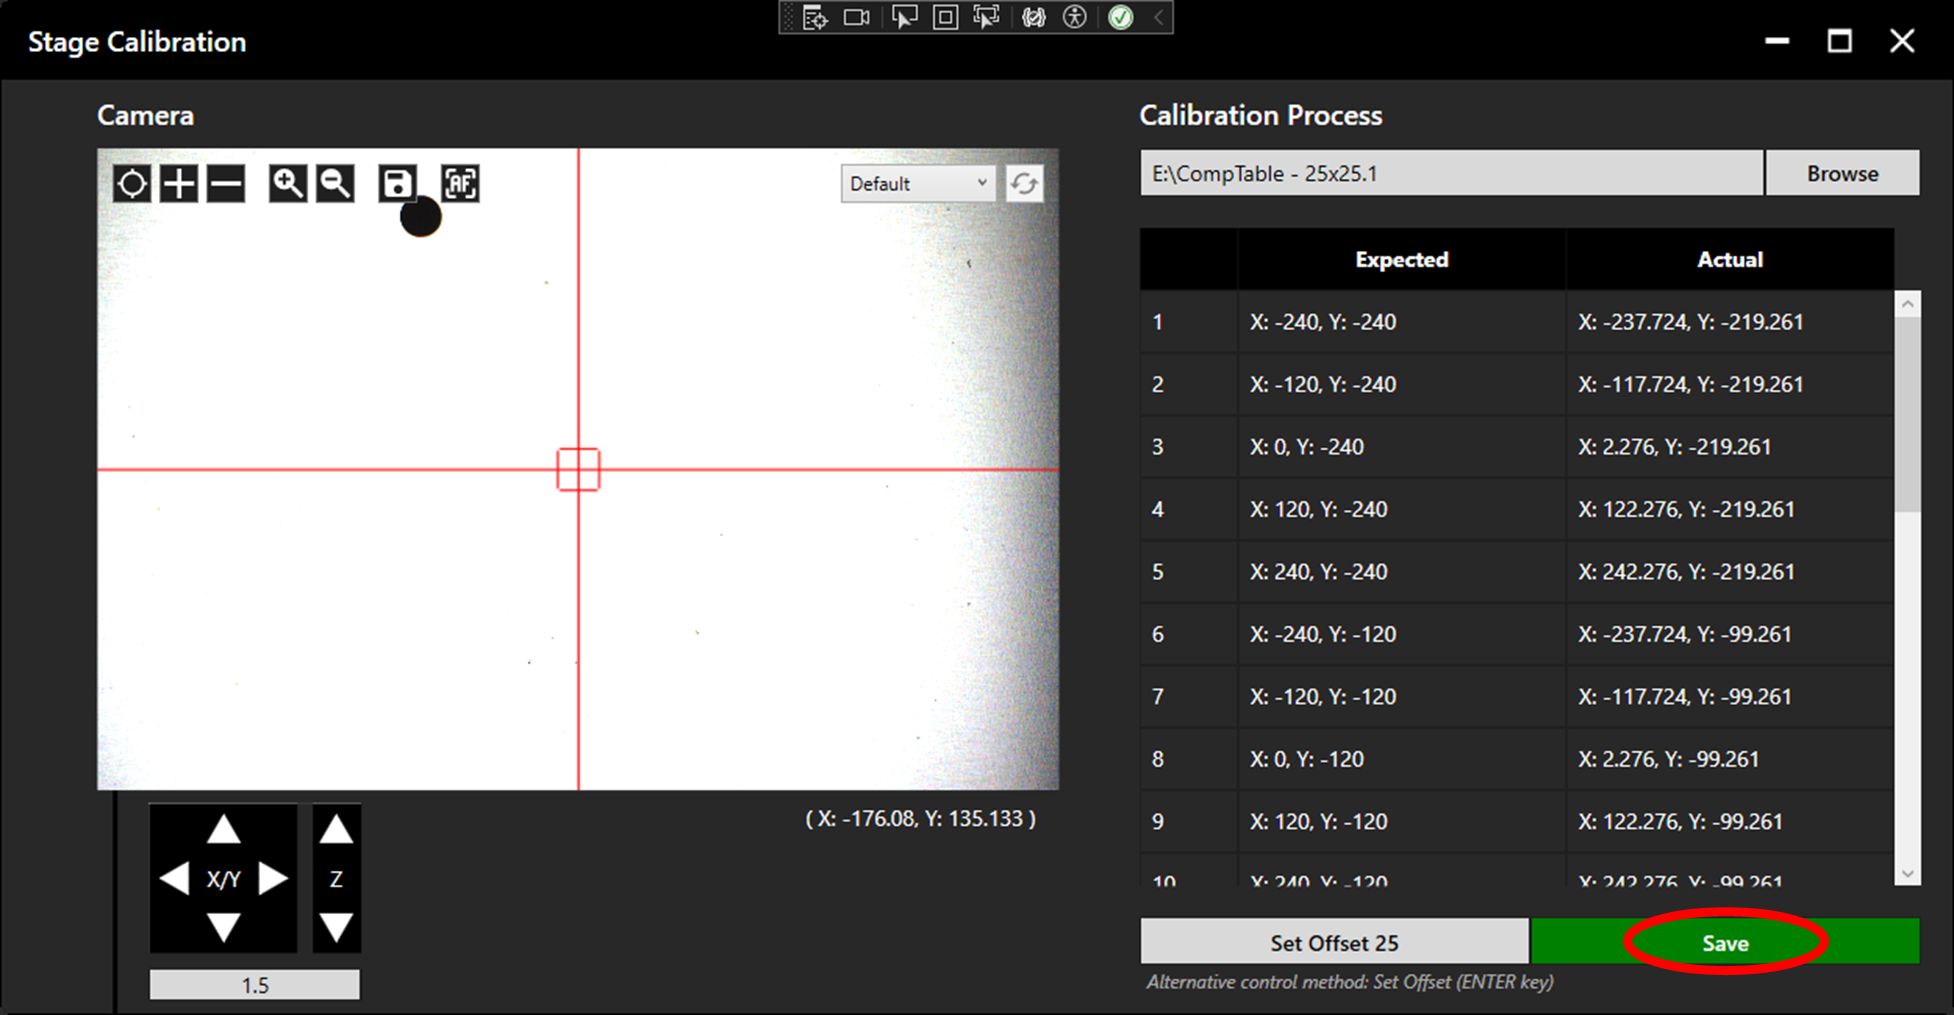
After setting the final offset, click Save. A pop-up will appear to confirm that Stage calibration has been completed. Click Ok and close the Stage Calibration window.
If the machine has access to AOI, a full scan of the stencil using the CompTable.1 file can be conducted to check that the calibration has been successful. Click here for more information on the AOI process.