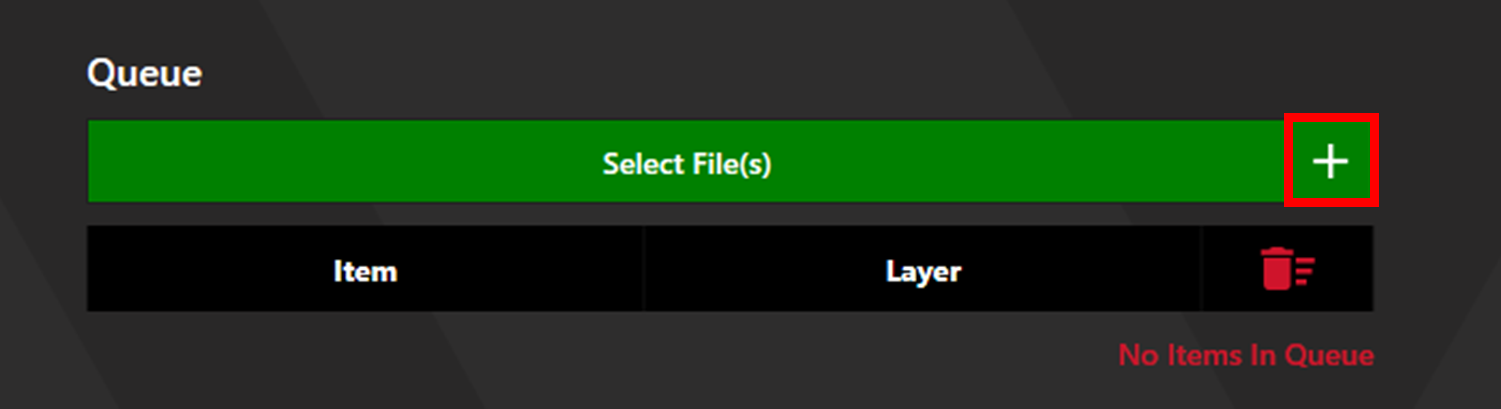
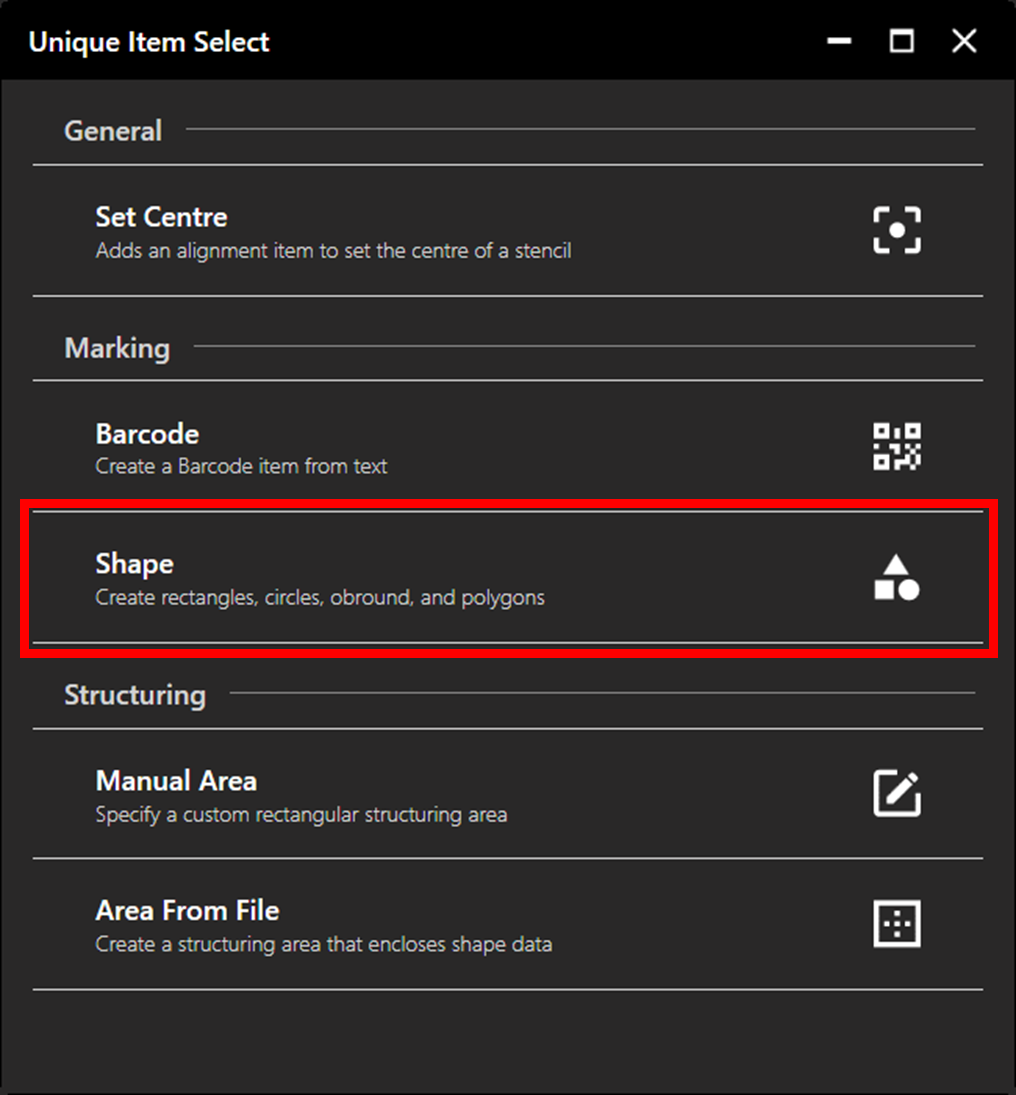
Click the plus button next to Select File(s) to access Unique Item Select, then select Shape.
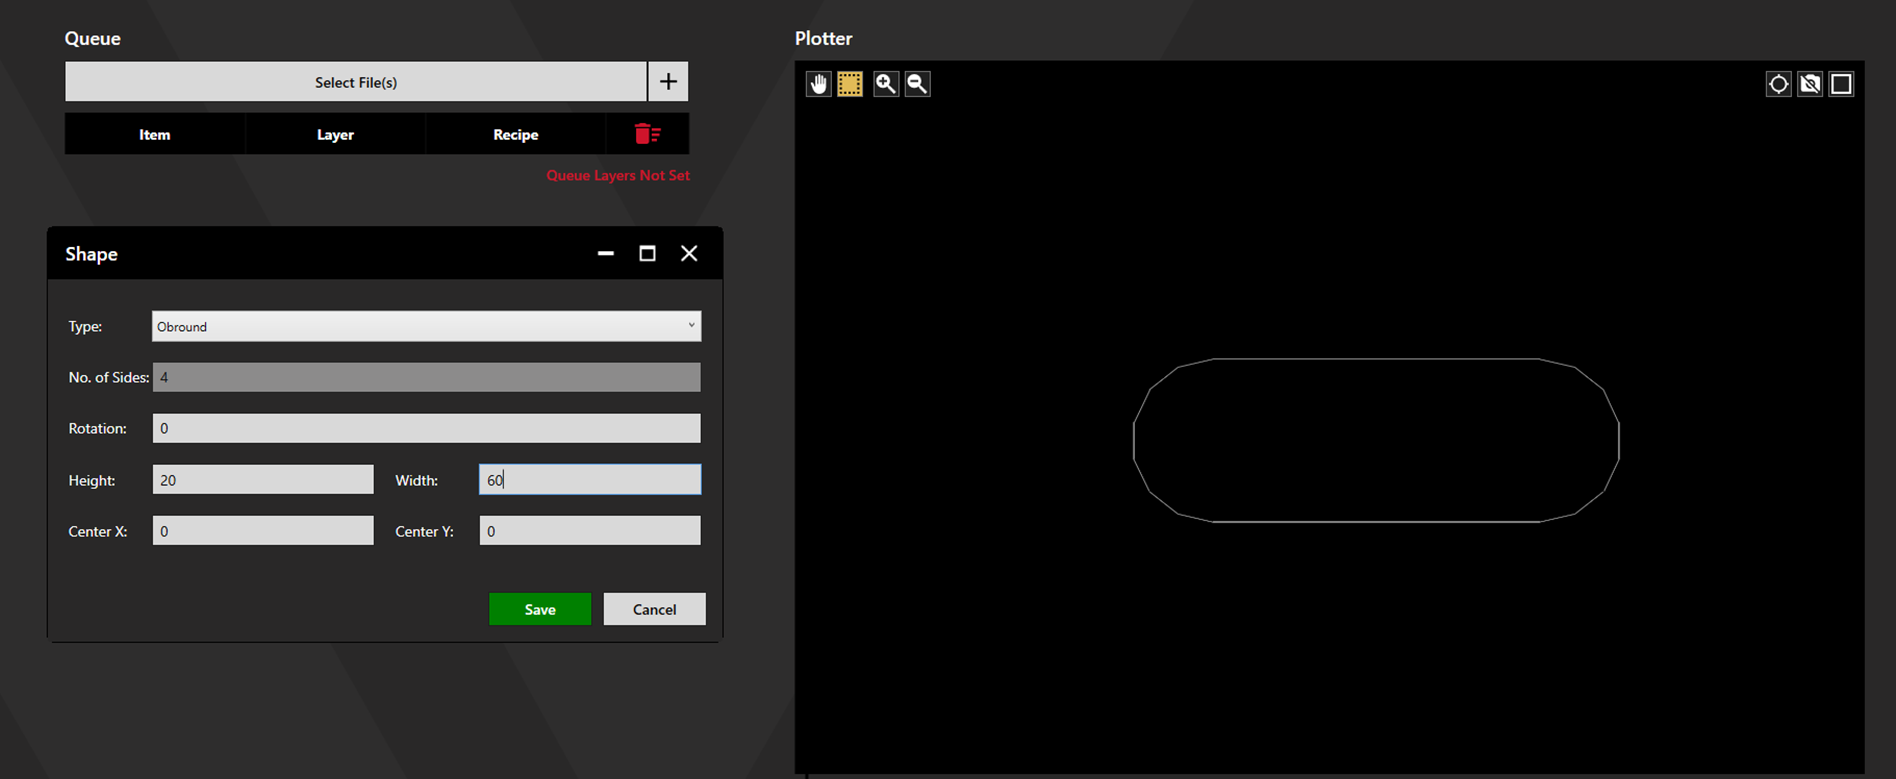
Select the desired shape from the dropdown menu. Set the location of the shape by entering centre coordinates. Set the desired dimensions in mm. A preview of the resulting shape will be displayed in the potter during the setting process. Click Save to add the shape to the queue.
Select the appropriate recipe for the desired Marking Settings. Edit the shape by clicking the pen icon.
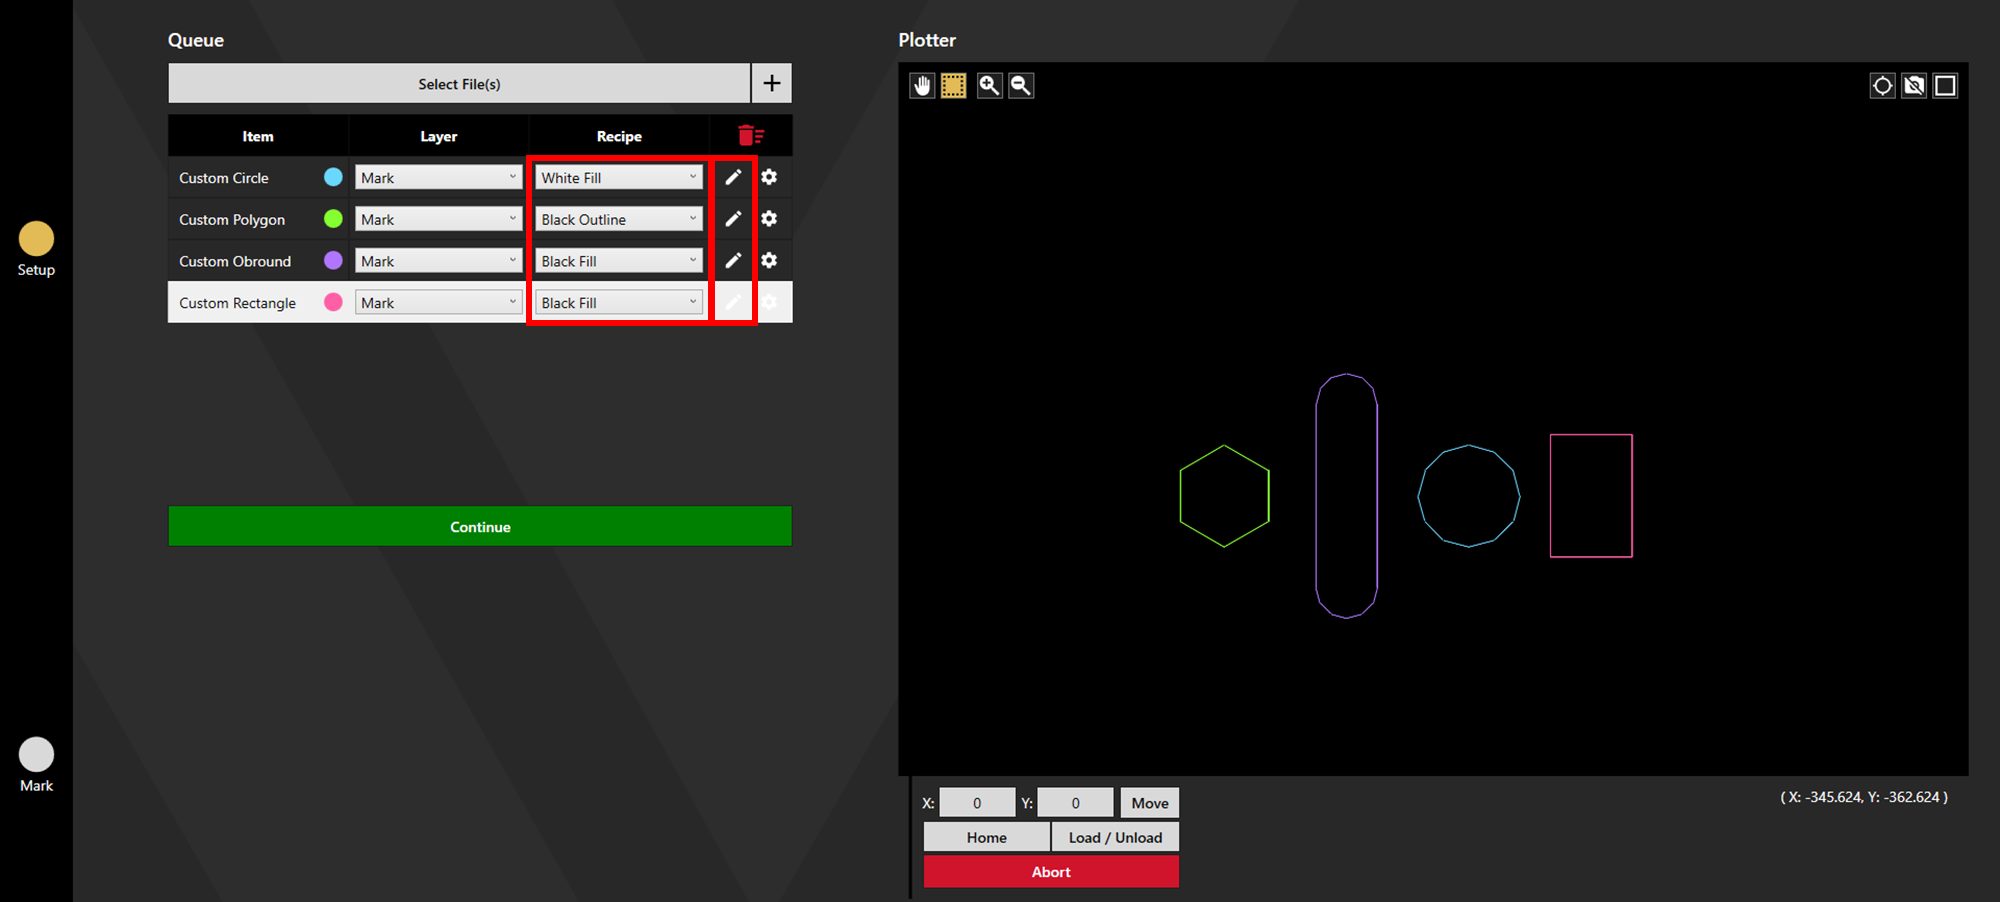
Additional files/processes can be added to the queue, then click Continue to proceed to Preview Output. For more detail on the general marking process see the Marking Process Manual.