TABLE OF CONTENTS
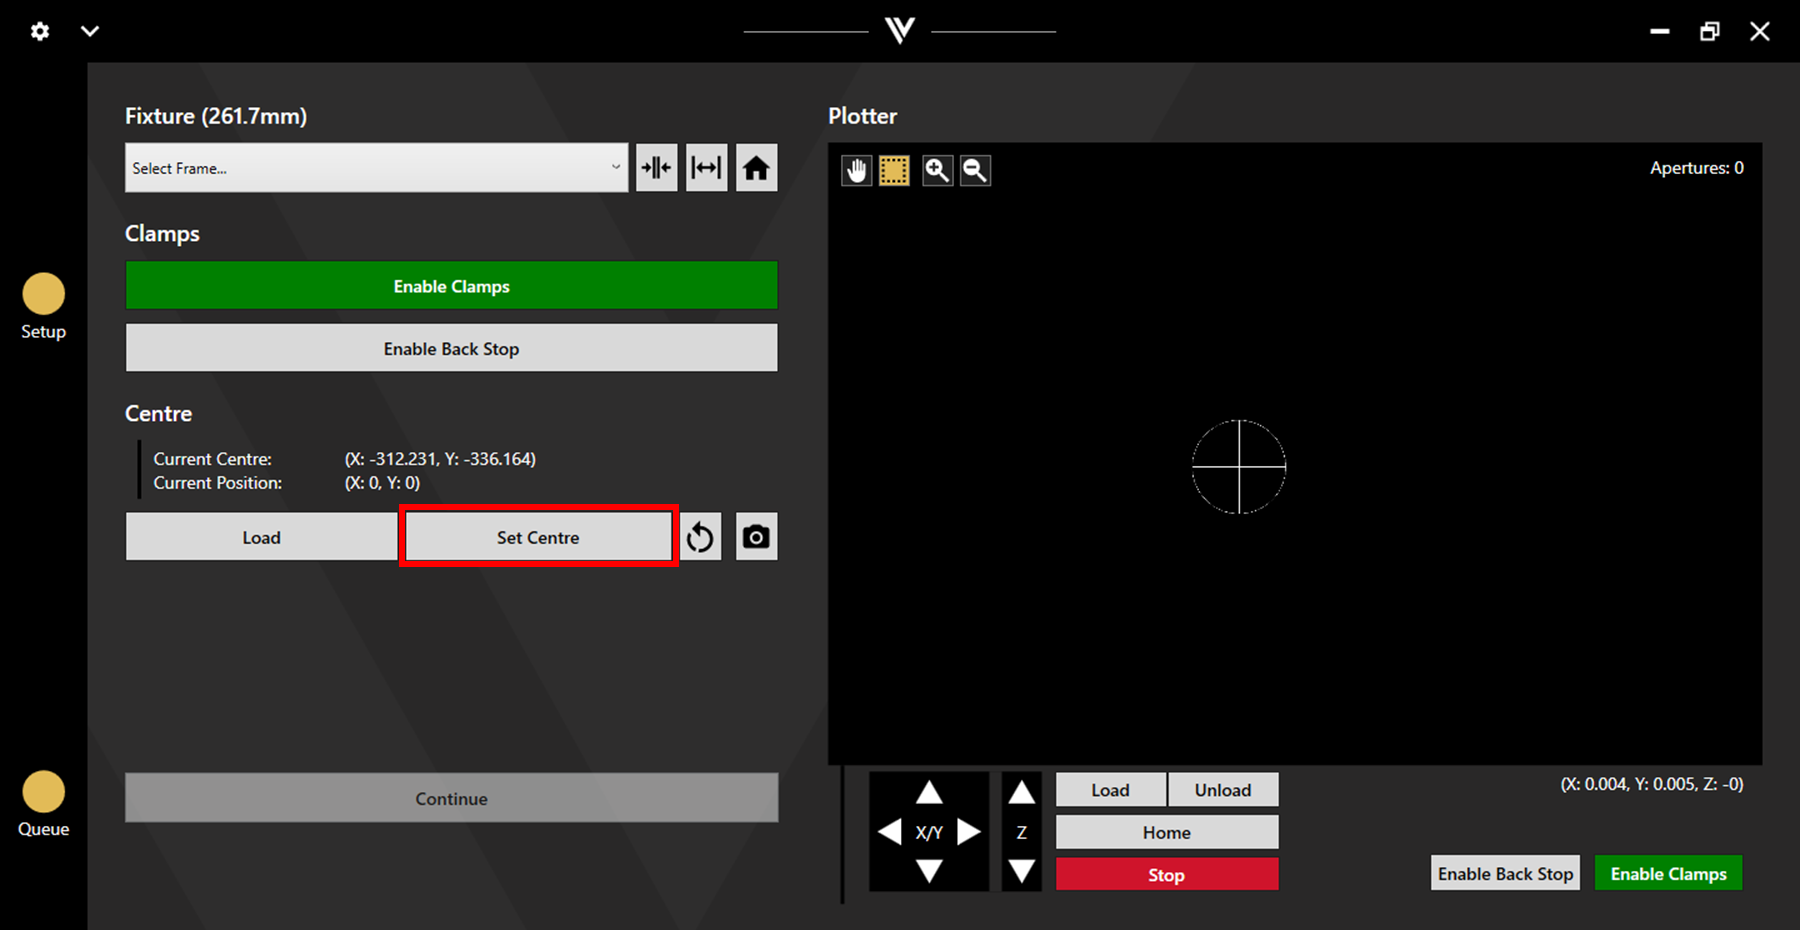
1. Setting a Temporary Centre
A temporary centre point can be set by moving the laser head over the desired centre point and clicking Set Centre. Any data loaded in will now be centred around this point. This remains the centre point until a new one is set.
2. Camera Centre Setting
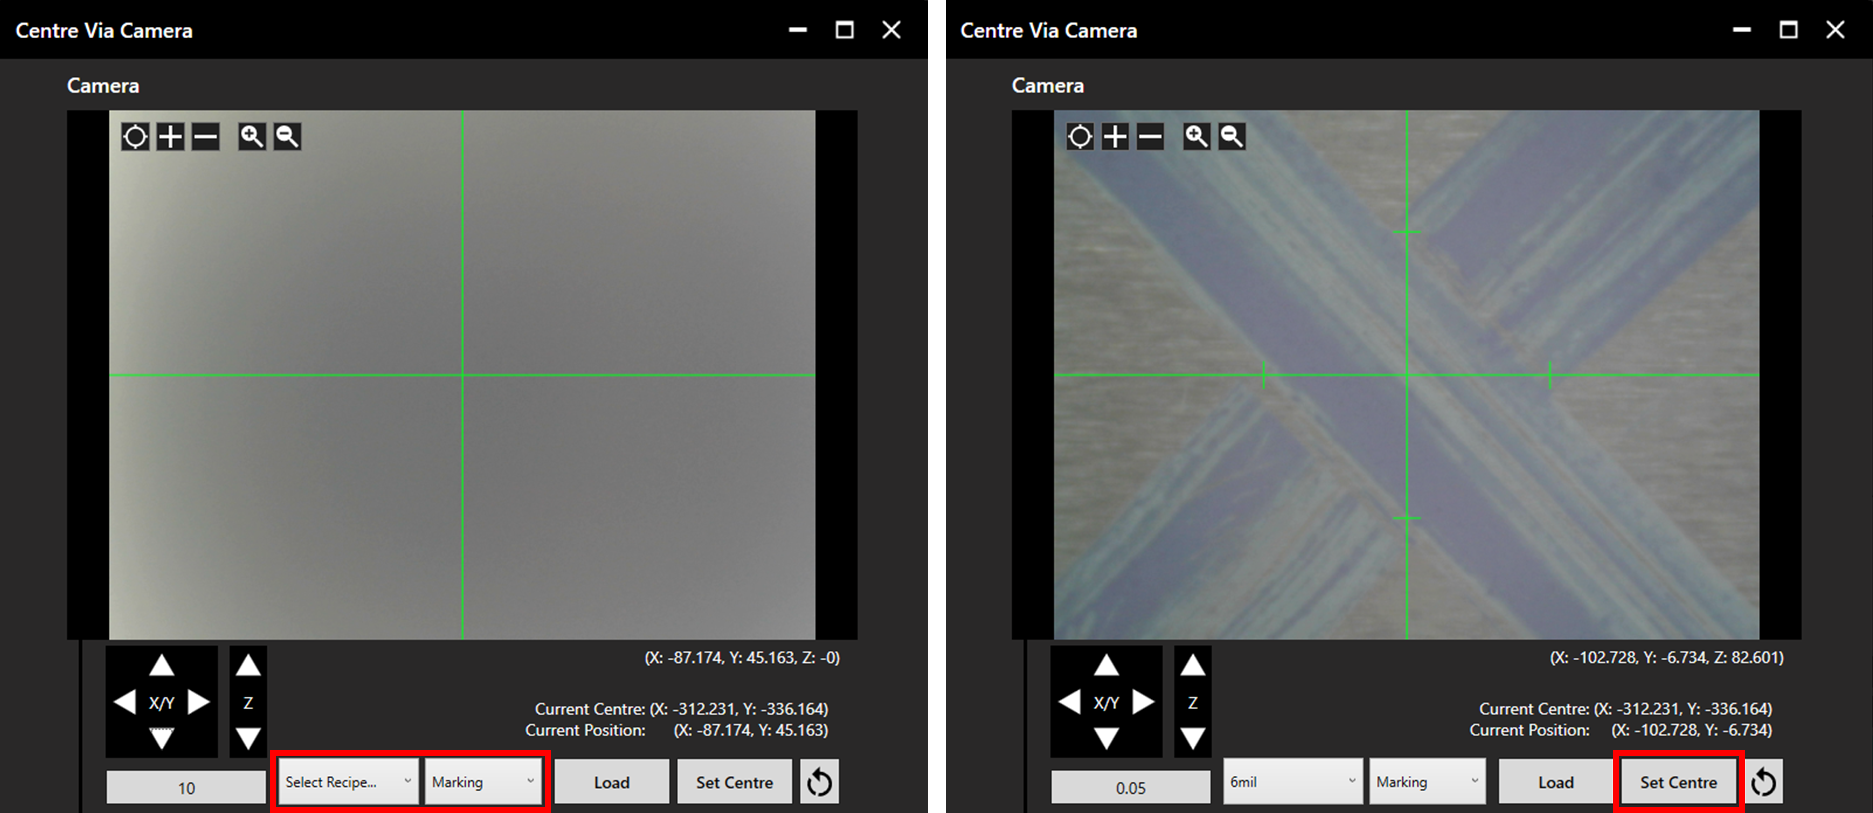
The centre can be set based on a marked location on a stencil. To do this, click the camera button next to the Set Centre button.

Jog the camera to the rough location of the centre mark, then select the appropriate recipe to focus the camera.
Note: If the Z height calibration for the recipe to the stencil is not good, the camera may be out of focus. This can be fixed using the Z jog arrows, or by recalibrating the Z height. See the Z Height Calibration article for more detail.
Once focused, align to the centre mark then click Set.
3. Return to Default Centre
The return to default centre button can be used to reset the centre to the machines default centre point. This is the same position which will be set as the centre when the machine is turned on.

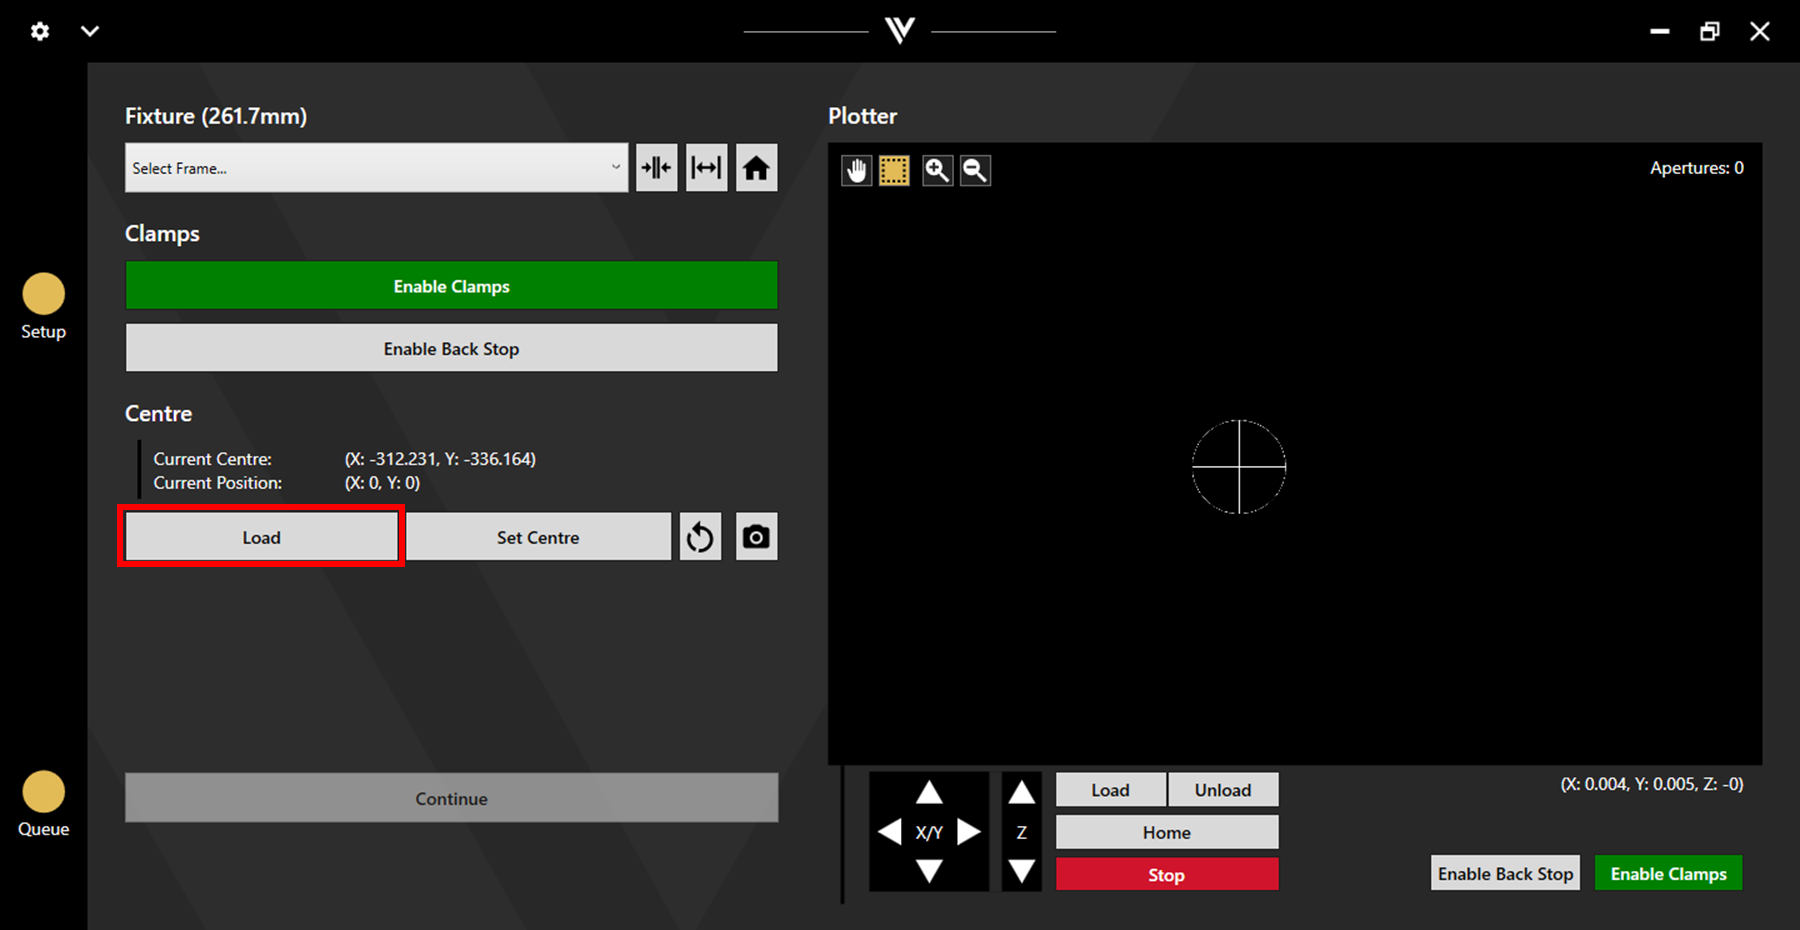
4. Check the Centre
Clicking load will move the laser head over the current centre position.
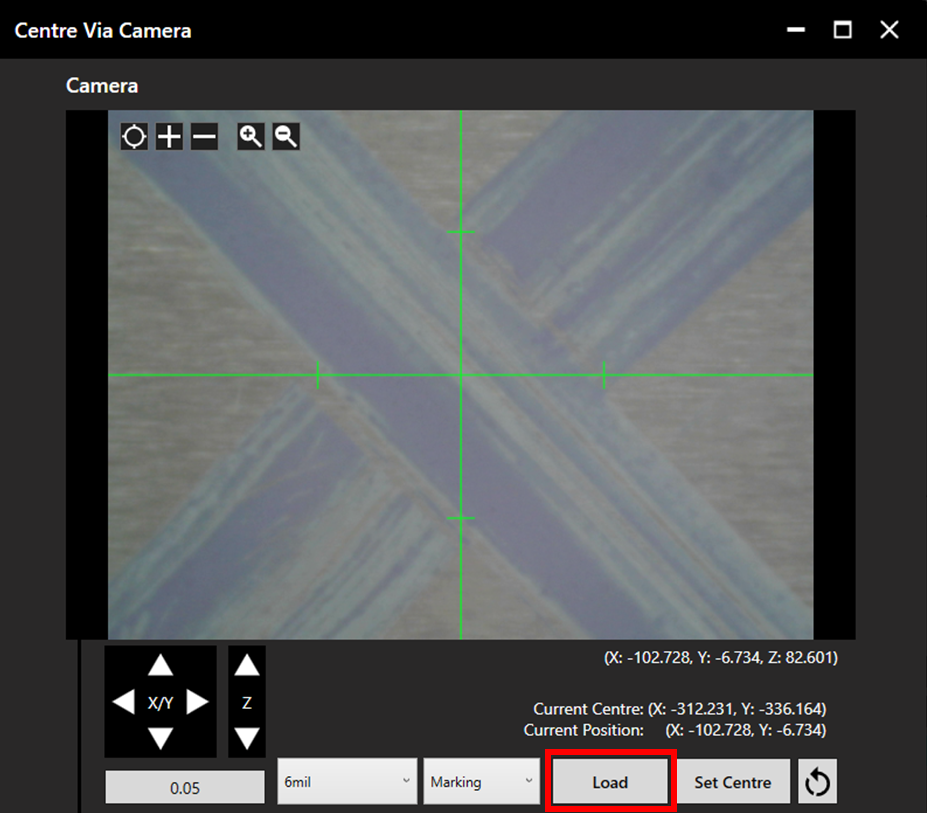
To check the centre point with the camera, click on the set centre with camera button, then select Load within the Centre Via Camera Window. Choose a recipe to bring the camera into focus. The camera will be displaying the currently set centre point.
Troubleshooting
If there appears to be a difference in the centre point when checking via the laser head vs the camera, camera offset may need recalibrated. See the Camera Offset article.